
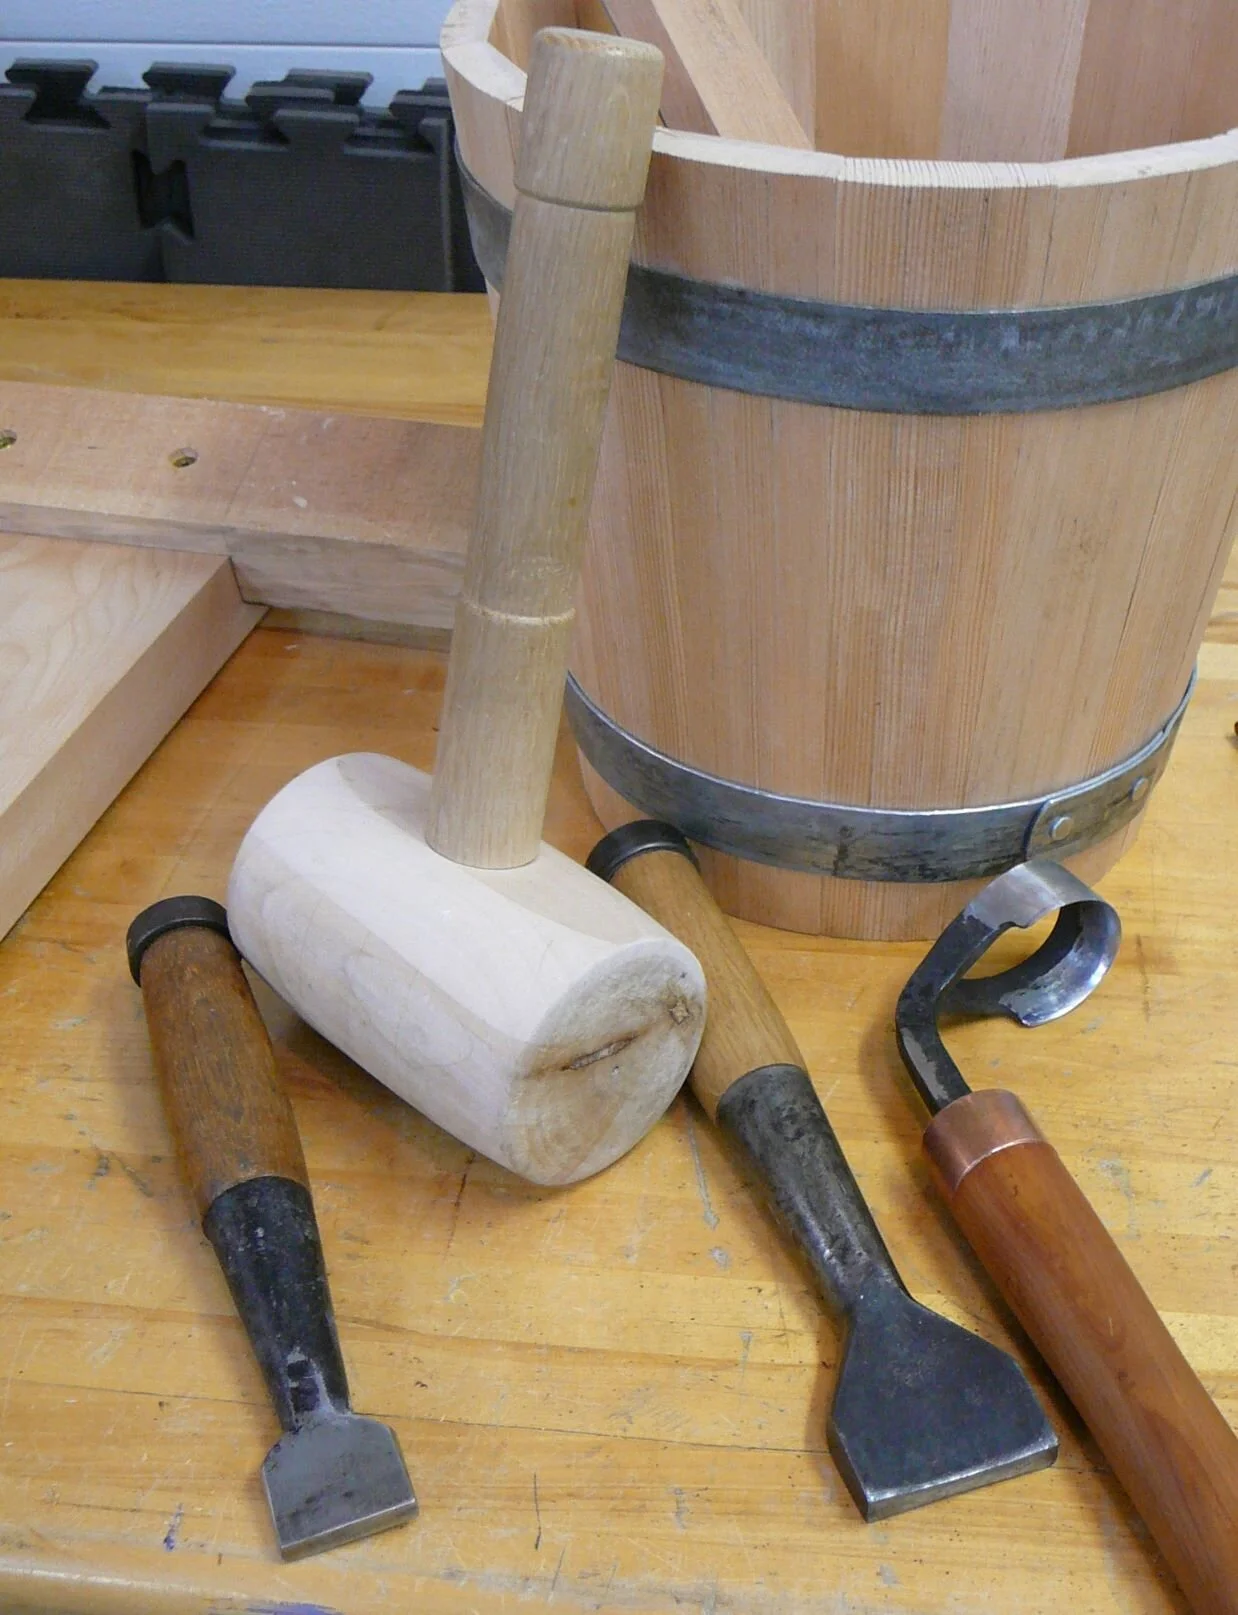
My Coopering Toolkit
Make a Place for Your Bucket List
I took a coopering course about three years ago at the Port Townsend School of Woodworking. This post provides an overview of the tools involved in the process.
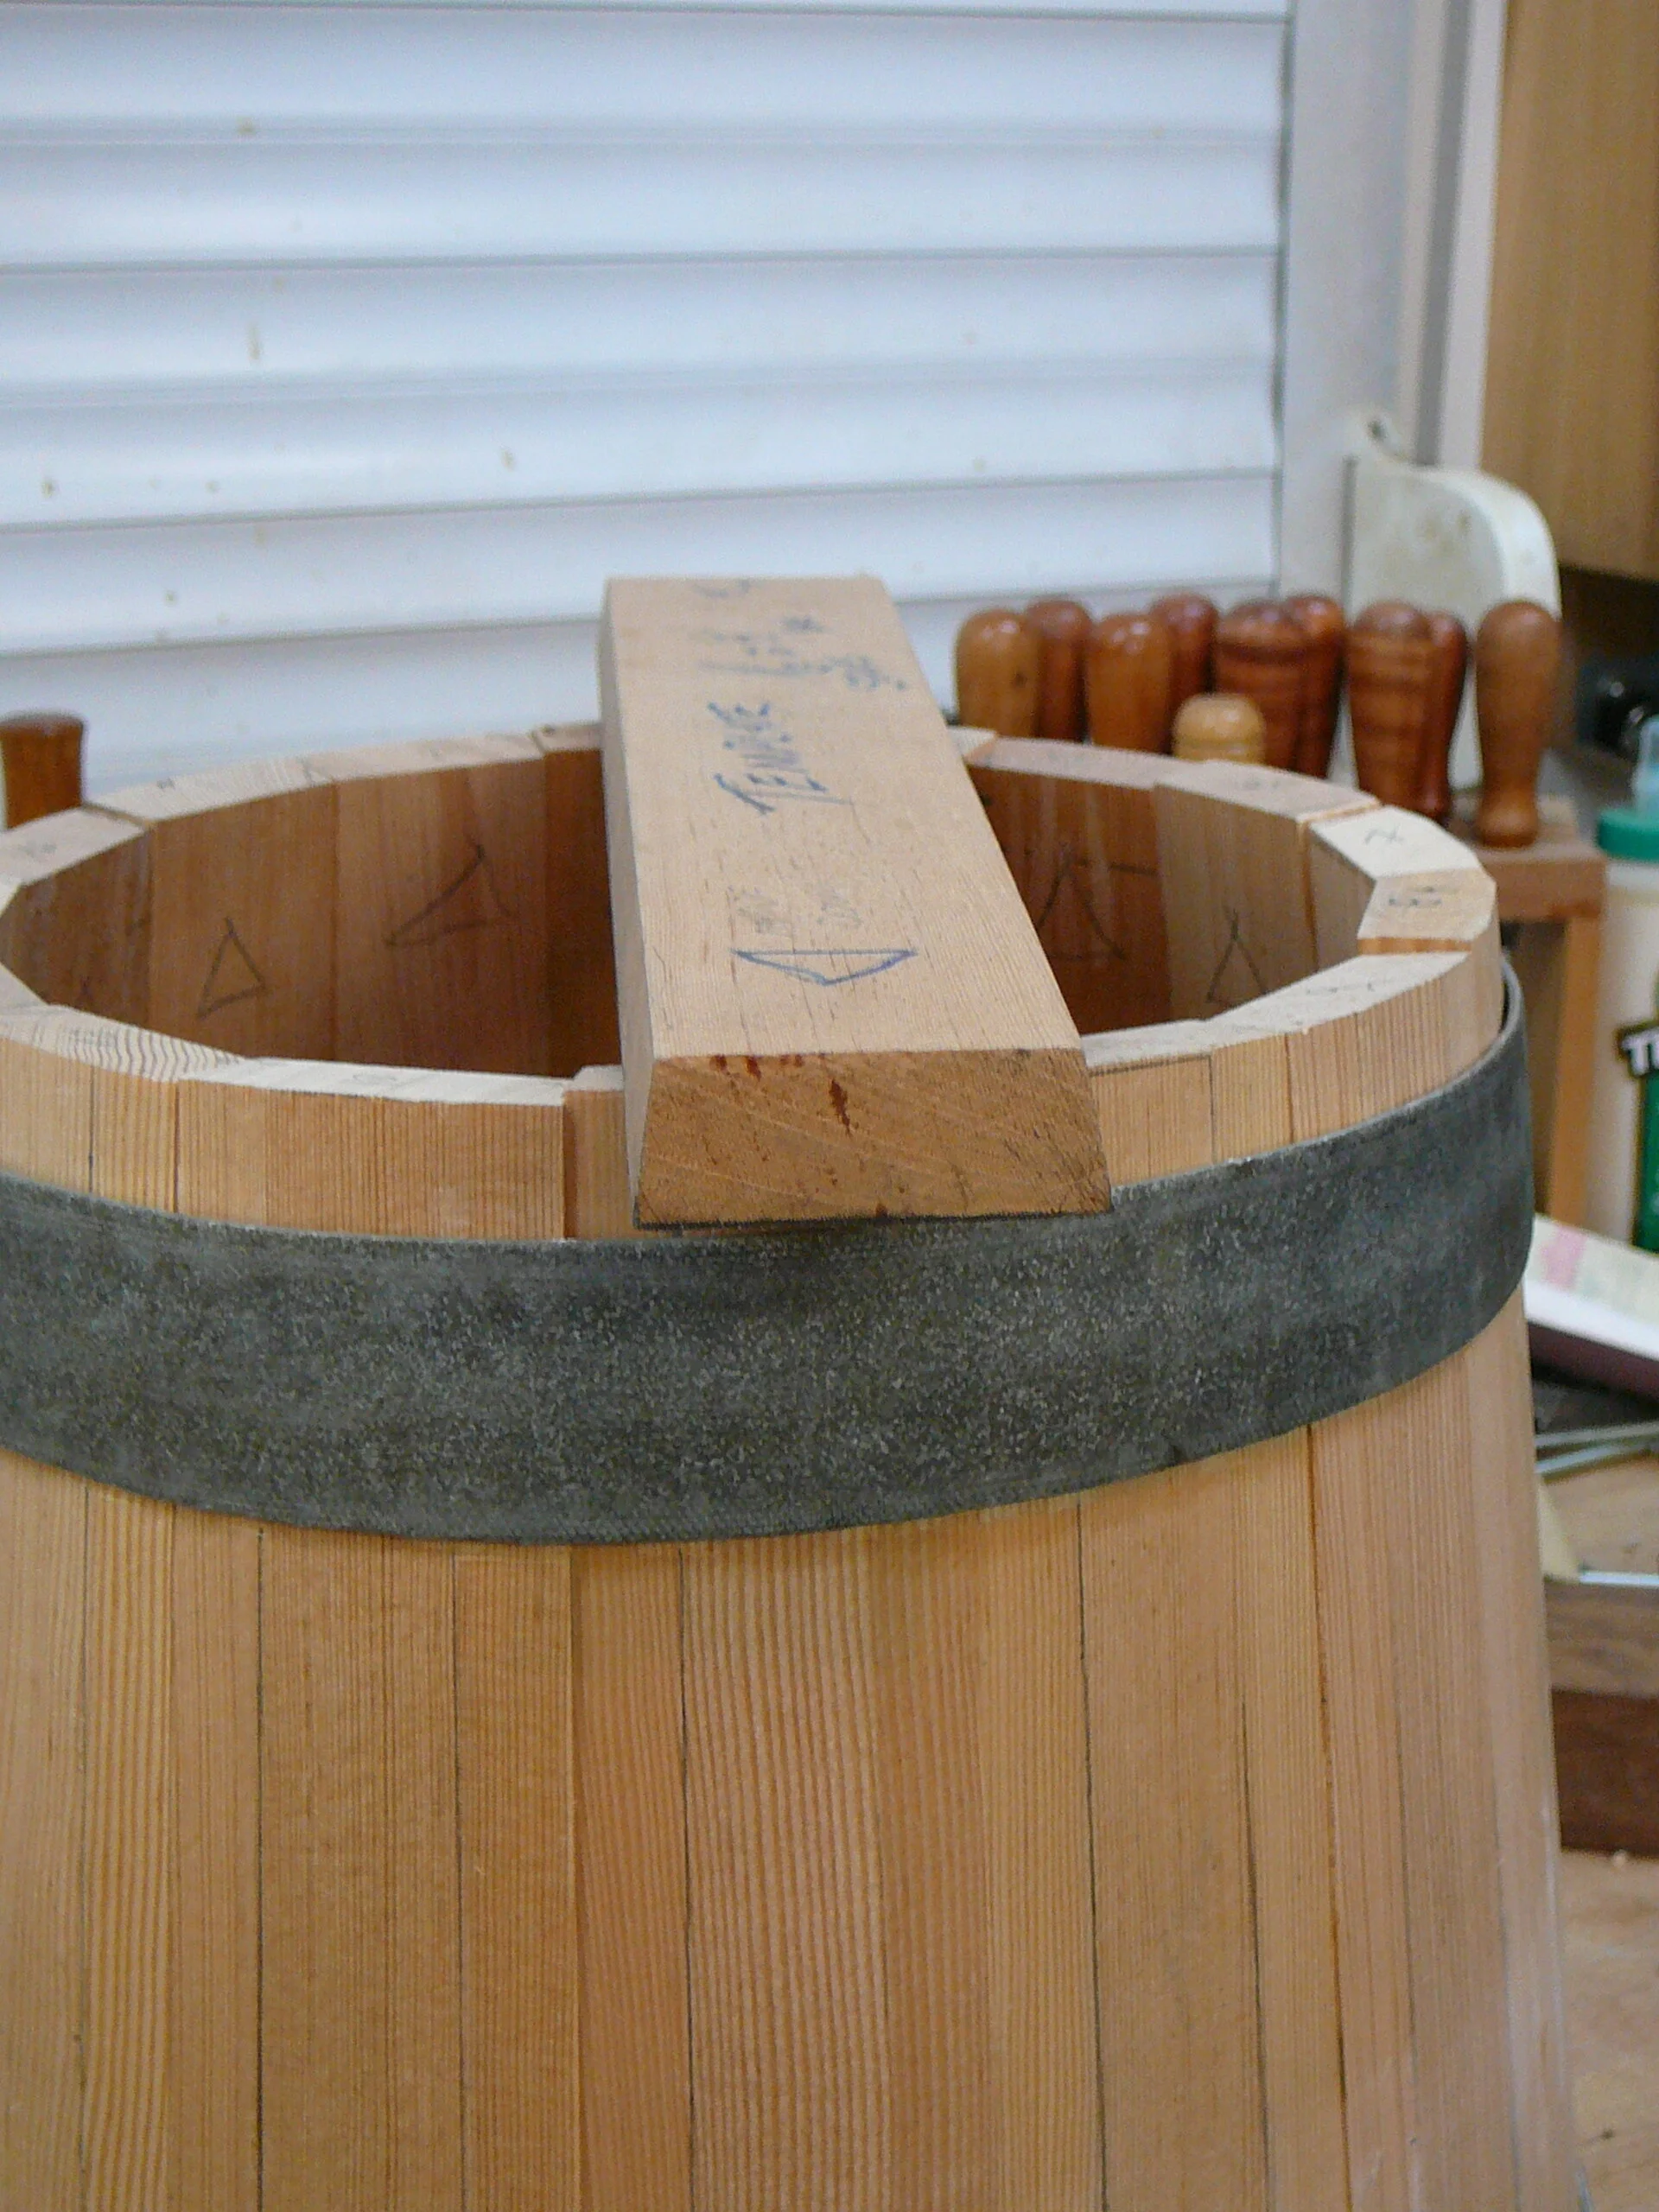
The first step in constructing a coopered bucket or barrel is cutting the staves. This is accomplished by tracing a template onto the stock and cutting it out on a bandsaw.
Bucket stave templates are tapered. Wider at the open end of the bucket and narrower at the base.

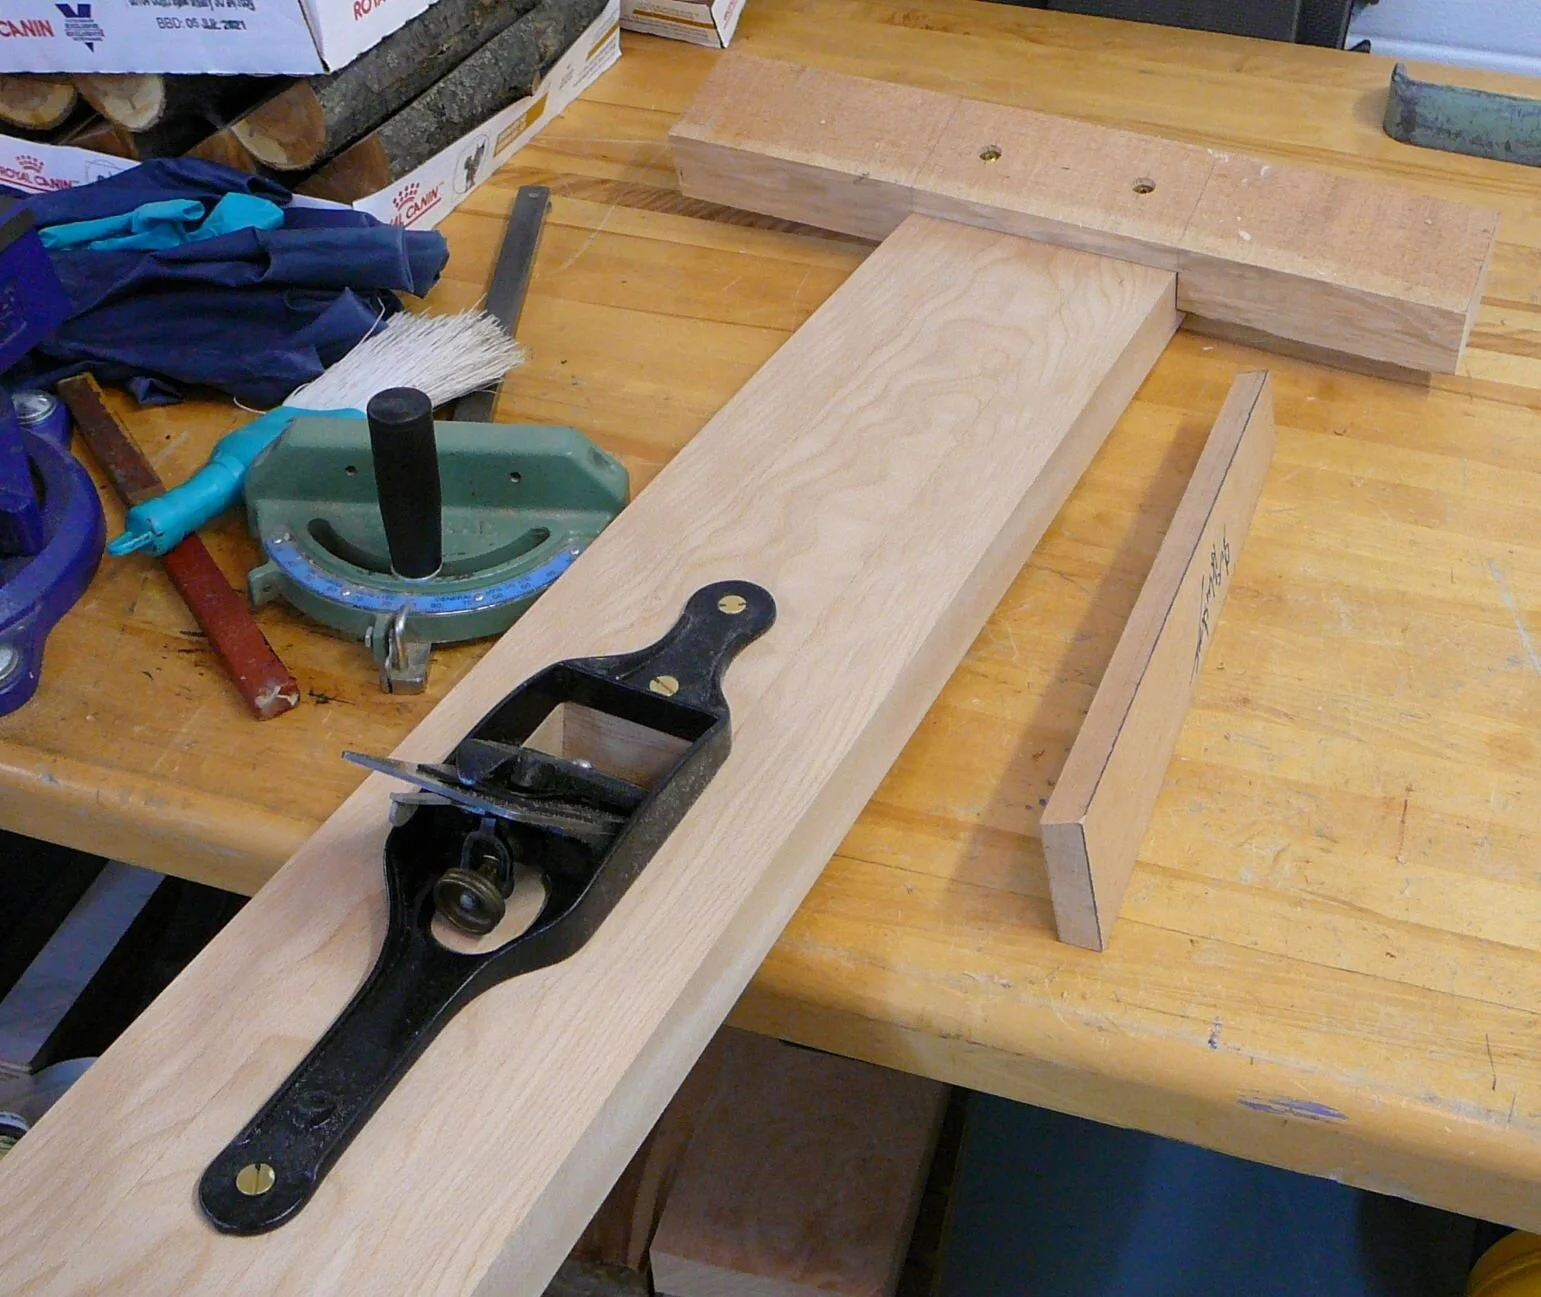
The stave templates have beveled sides. The amount of bevel is dependant on the diameter of the bucket and number of staves.
After the staves are cut on the bandsaw a coopers plane is used to add the side bevels
This is a top view of my cooper’s plane. You can see the opening for the plane blade in the middle. To bevel the staves, you hold the stave at the desired angle and run it across the blade.

This is a bottom view showing the plane hardware. It is essentially the mechanical works from a transitional Stanley plane. Number 8 size, 2-5/8” wide. I copied the wood profile from the old plane and made it five feet long.
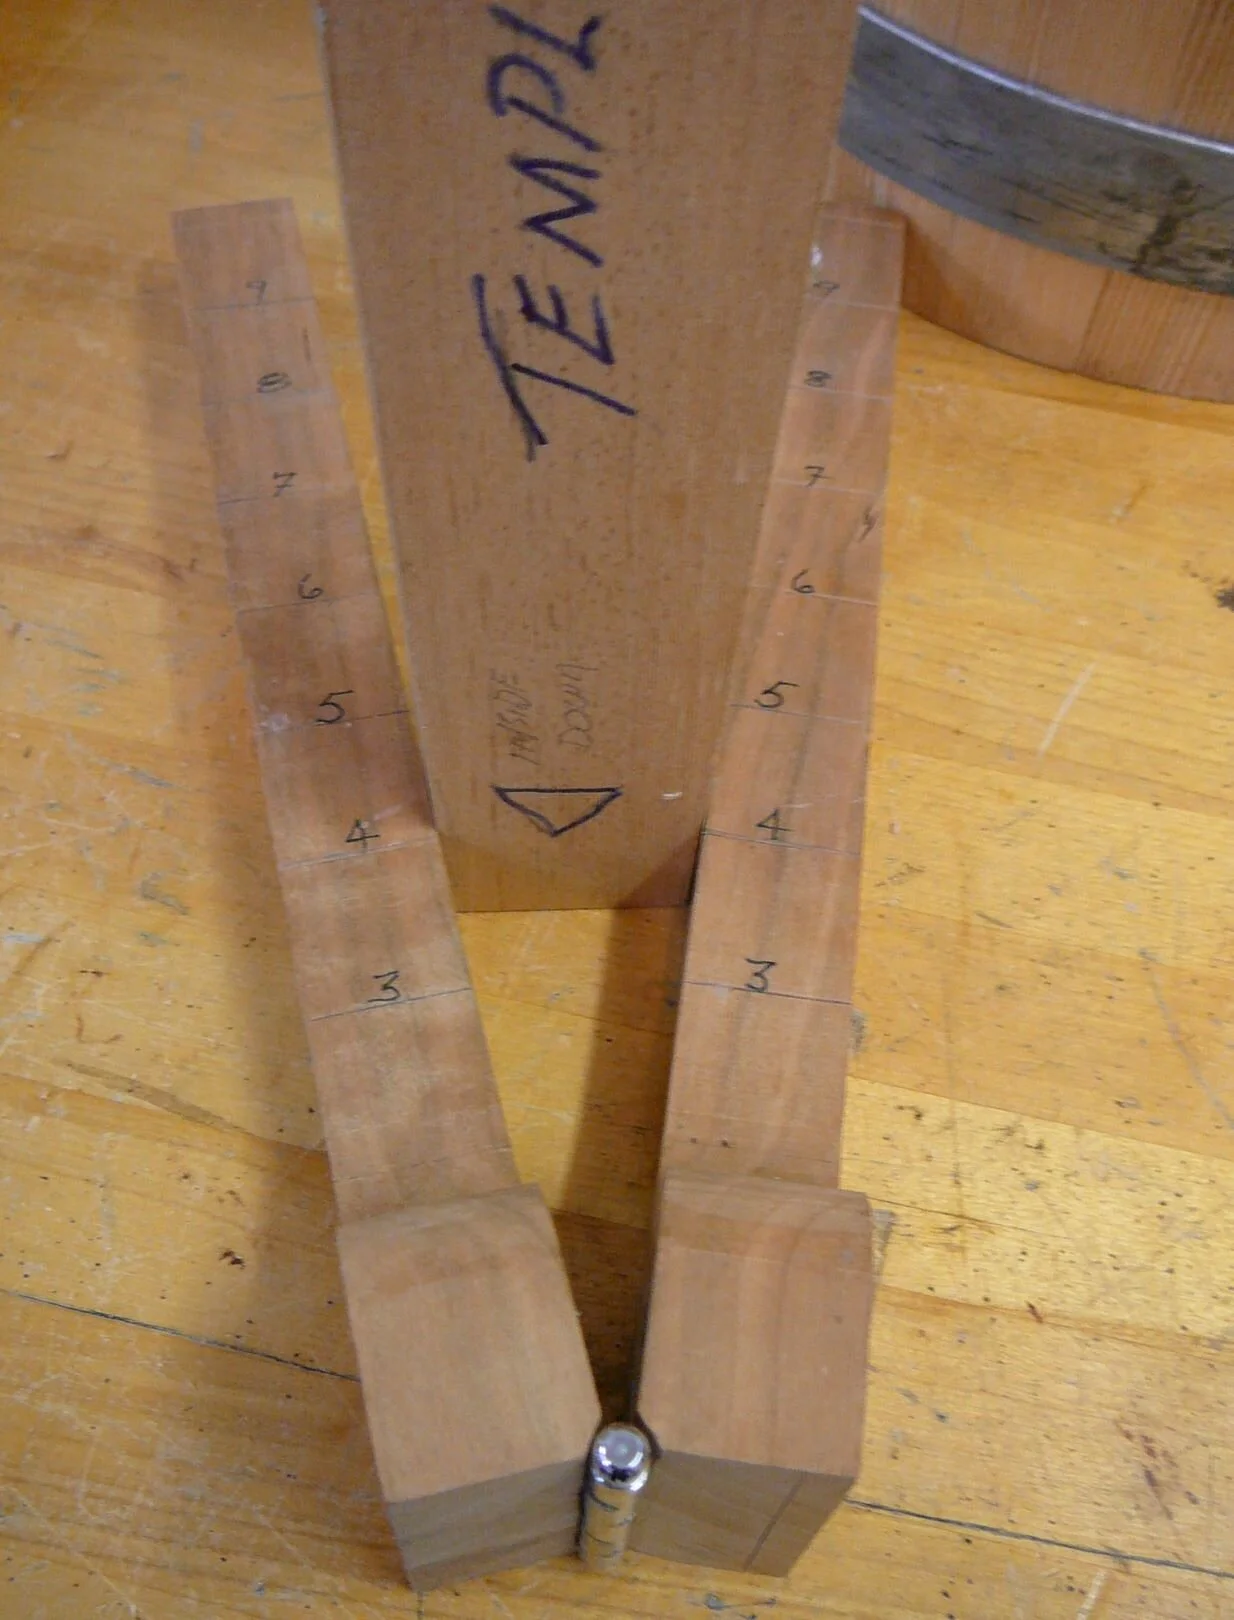
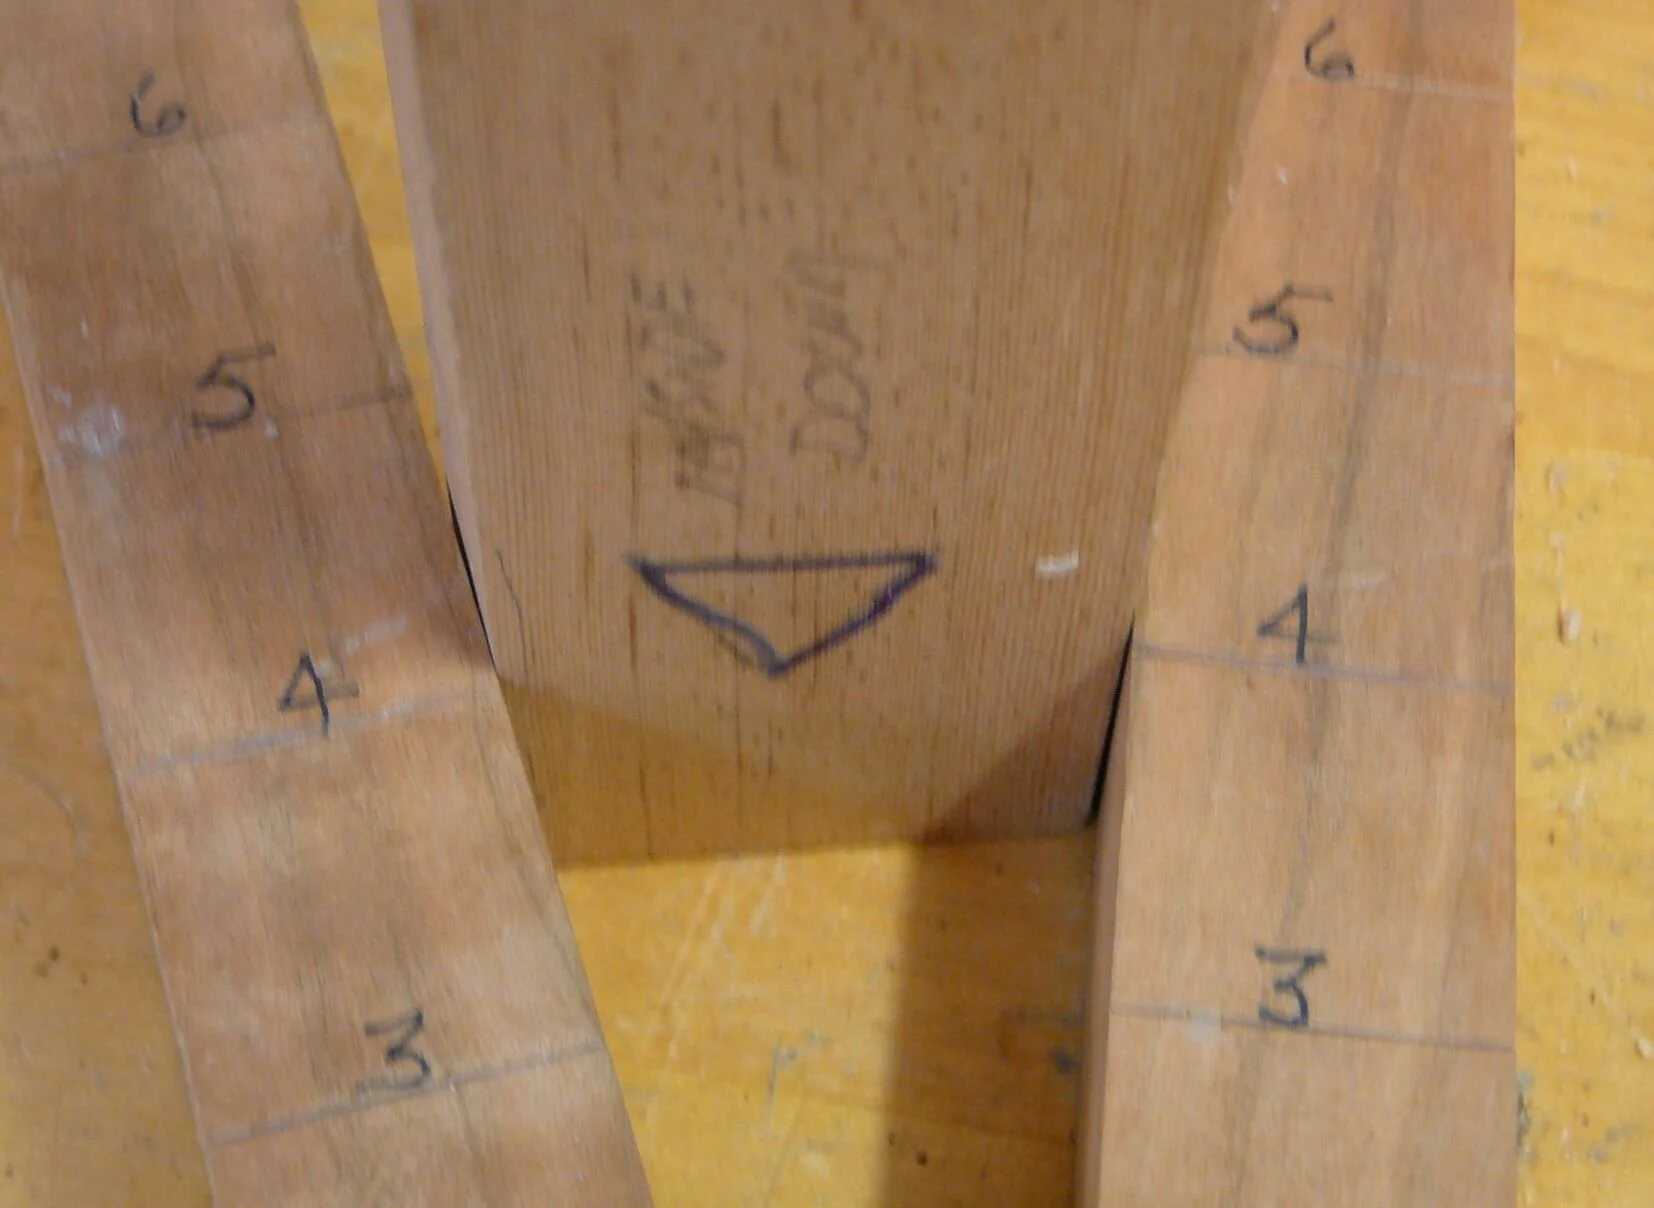
A sector is used to set and check the stave side bevels. the numbers marked on the sector correspond to the radius of the bucket you are constructing.
This bucket is made out of fir with hoops made out of recycled whisky barrel bands.

The hoops are curved and flared. They start life flat. You rivet them together then hit them on the inside with a hammer to flare them out.


Hoop drivers are used to drive the metal hoops on and off during construction. You could use a piece of metal or hardwood but it seems more fun to use a driver. I found these drivers on eBay.

A scorp is used to shape the inside of the bucket before you cut the groove on the inside to capture the bottom. This scorp was made by Steve Habersetzer who taught the coopering course.

The groove in the bottom of the bucket is cut using a croze. The pictures below show the croze upside down. You would turn it over and run it around the inside of the bucket bottom to cut the groove. There are two nickers for cutting and a tooth like an old fashion router. It cuts a groove about an eighth of an inch wide and an eighth of an inch deep.
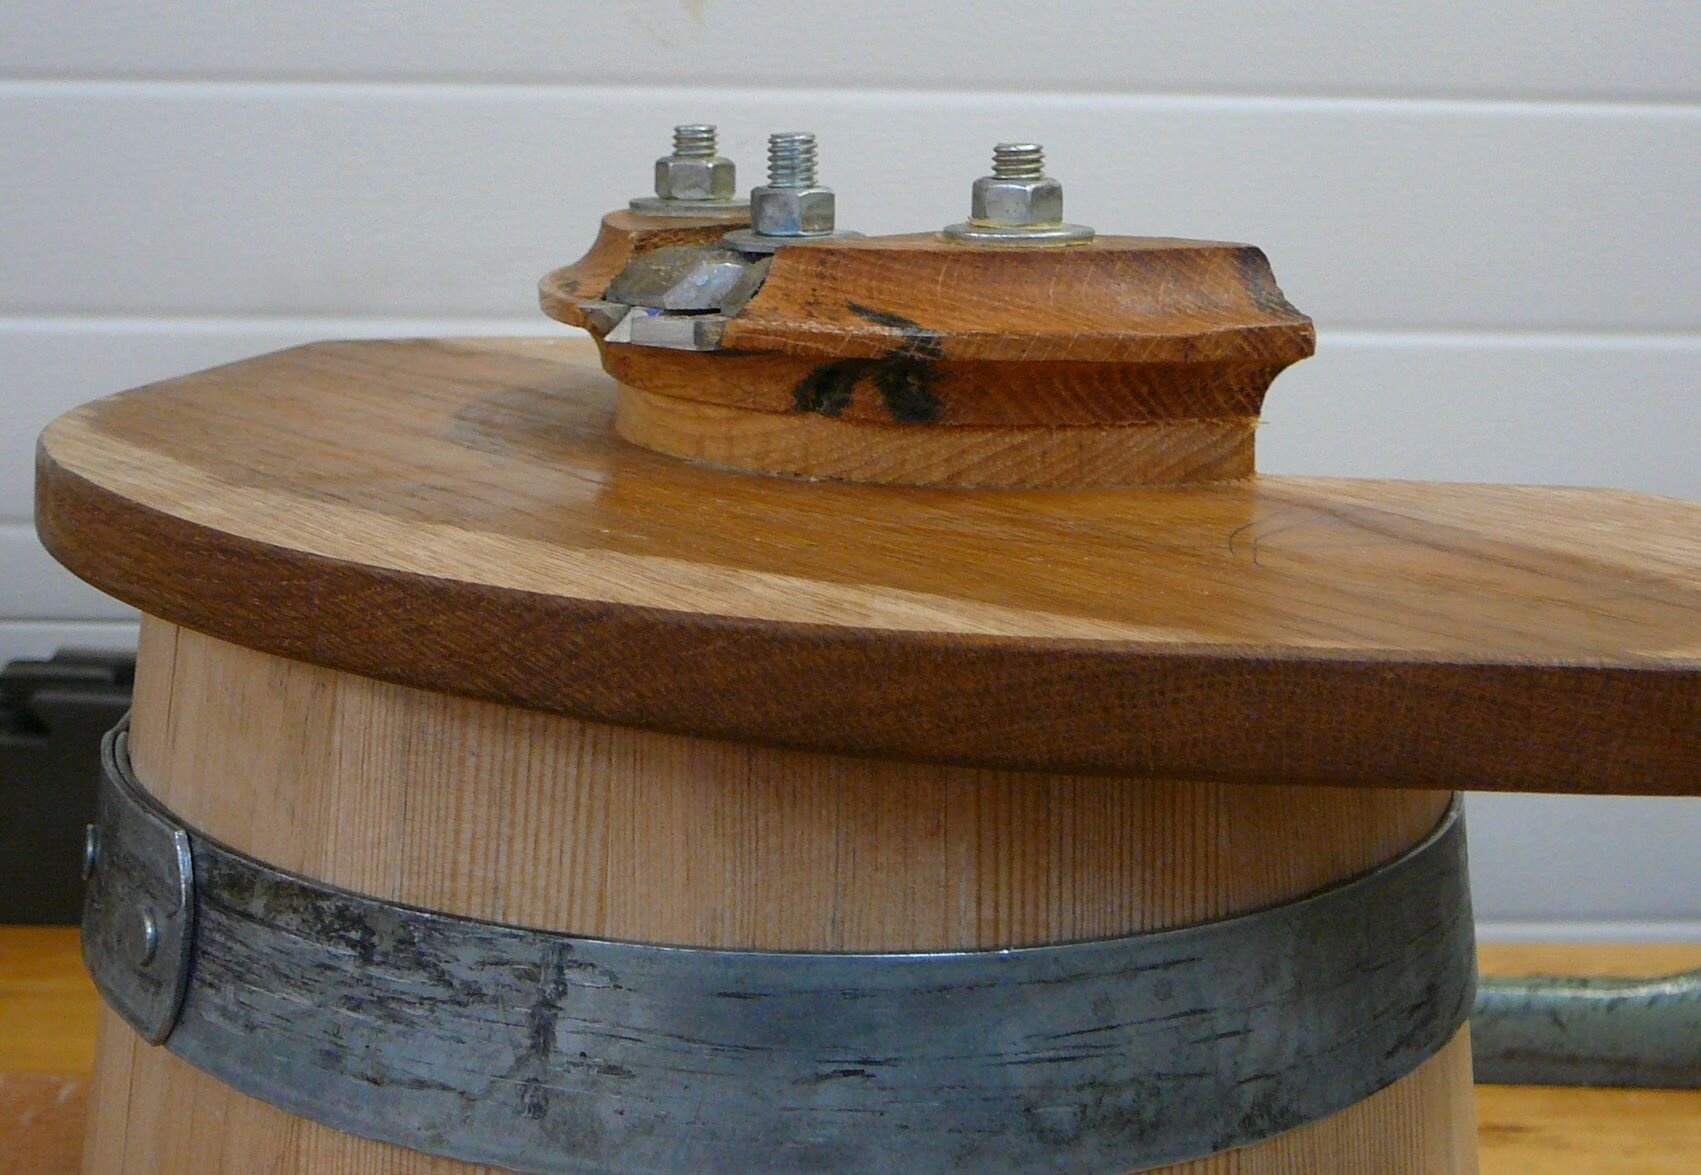

A curved plane called a sun or topping plane is used to flatten the top and bottom of the bucket. I purchased my sun plane at Hardwick & Sons in Seattle. The bottom of the bucket was turned on a lathe to make it round and to add the edge detail to fit into the previously cut groove.


With perseverance and a bit of luck you will make a bucket that will hold water or your "Bucket List"!