
Vidar’s Chair
I’ve always been fascinated with chairs and their design so I was really looking forward to building Vidar’s chair. Over the past couple of years, I’ve been attending the Inside Passage School of Fine Woodworking out on the BC Sunshine Coast. This chair is the third term project.
It was designed by Vidar Malmsten around 1970 in Sweden. My understanding is that it was intended to be a dining chair but never made it into commercial production due to the amount of hand tool work required.
You couldn’t ask for a better teaching tool as it encompasses grain graphics, complex joinery and loads of hand shaping. I’m definitely ‘at one’ with my spokeshave now. The joinery is predominantly mortise and tenon ranging from simple centered tenons, to offset, to angled, to compound angled tenons, to compound angle on a curve.
An exceptional piece of 10/4 white oak is what was used to make the chair. As I’m just under 195 cm tall you can get an appreciation of the size of the plank I had access to.

The first step was to make templates for all the various parts. The plank was then examined to determine the best place to get the various components from as well as locate potential defects such as checks and cracks. Of course, I found an embedded bullet exactly where I wanted to take the crest rail from. But with a bit of finessing was able to work around it.
The back legs were the first items to extract as they are the longest and hardest pieces to obtain.

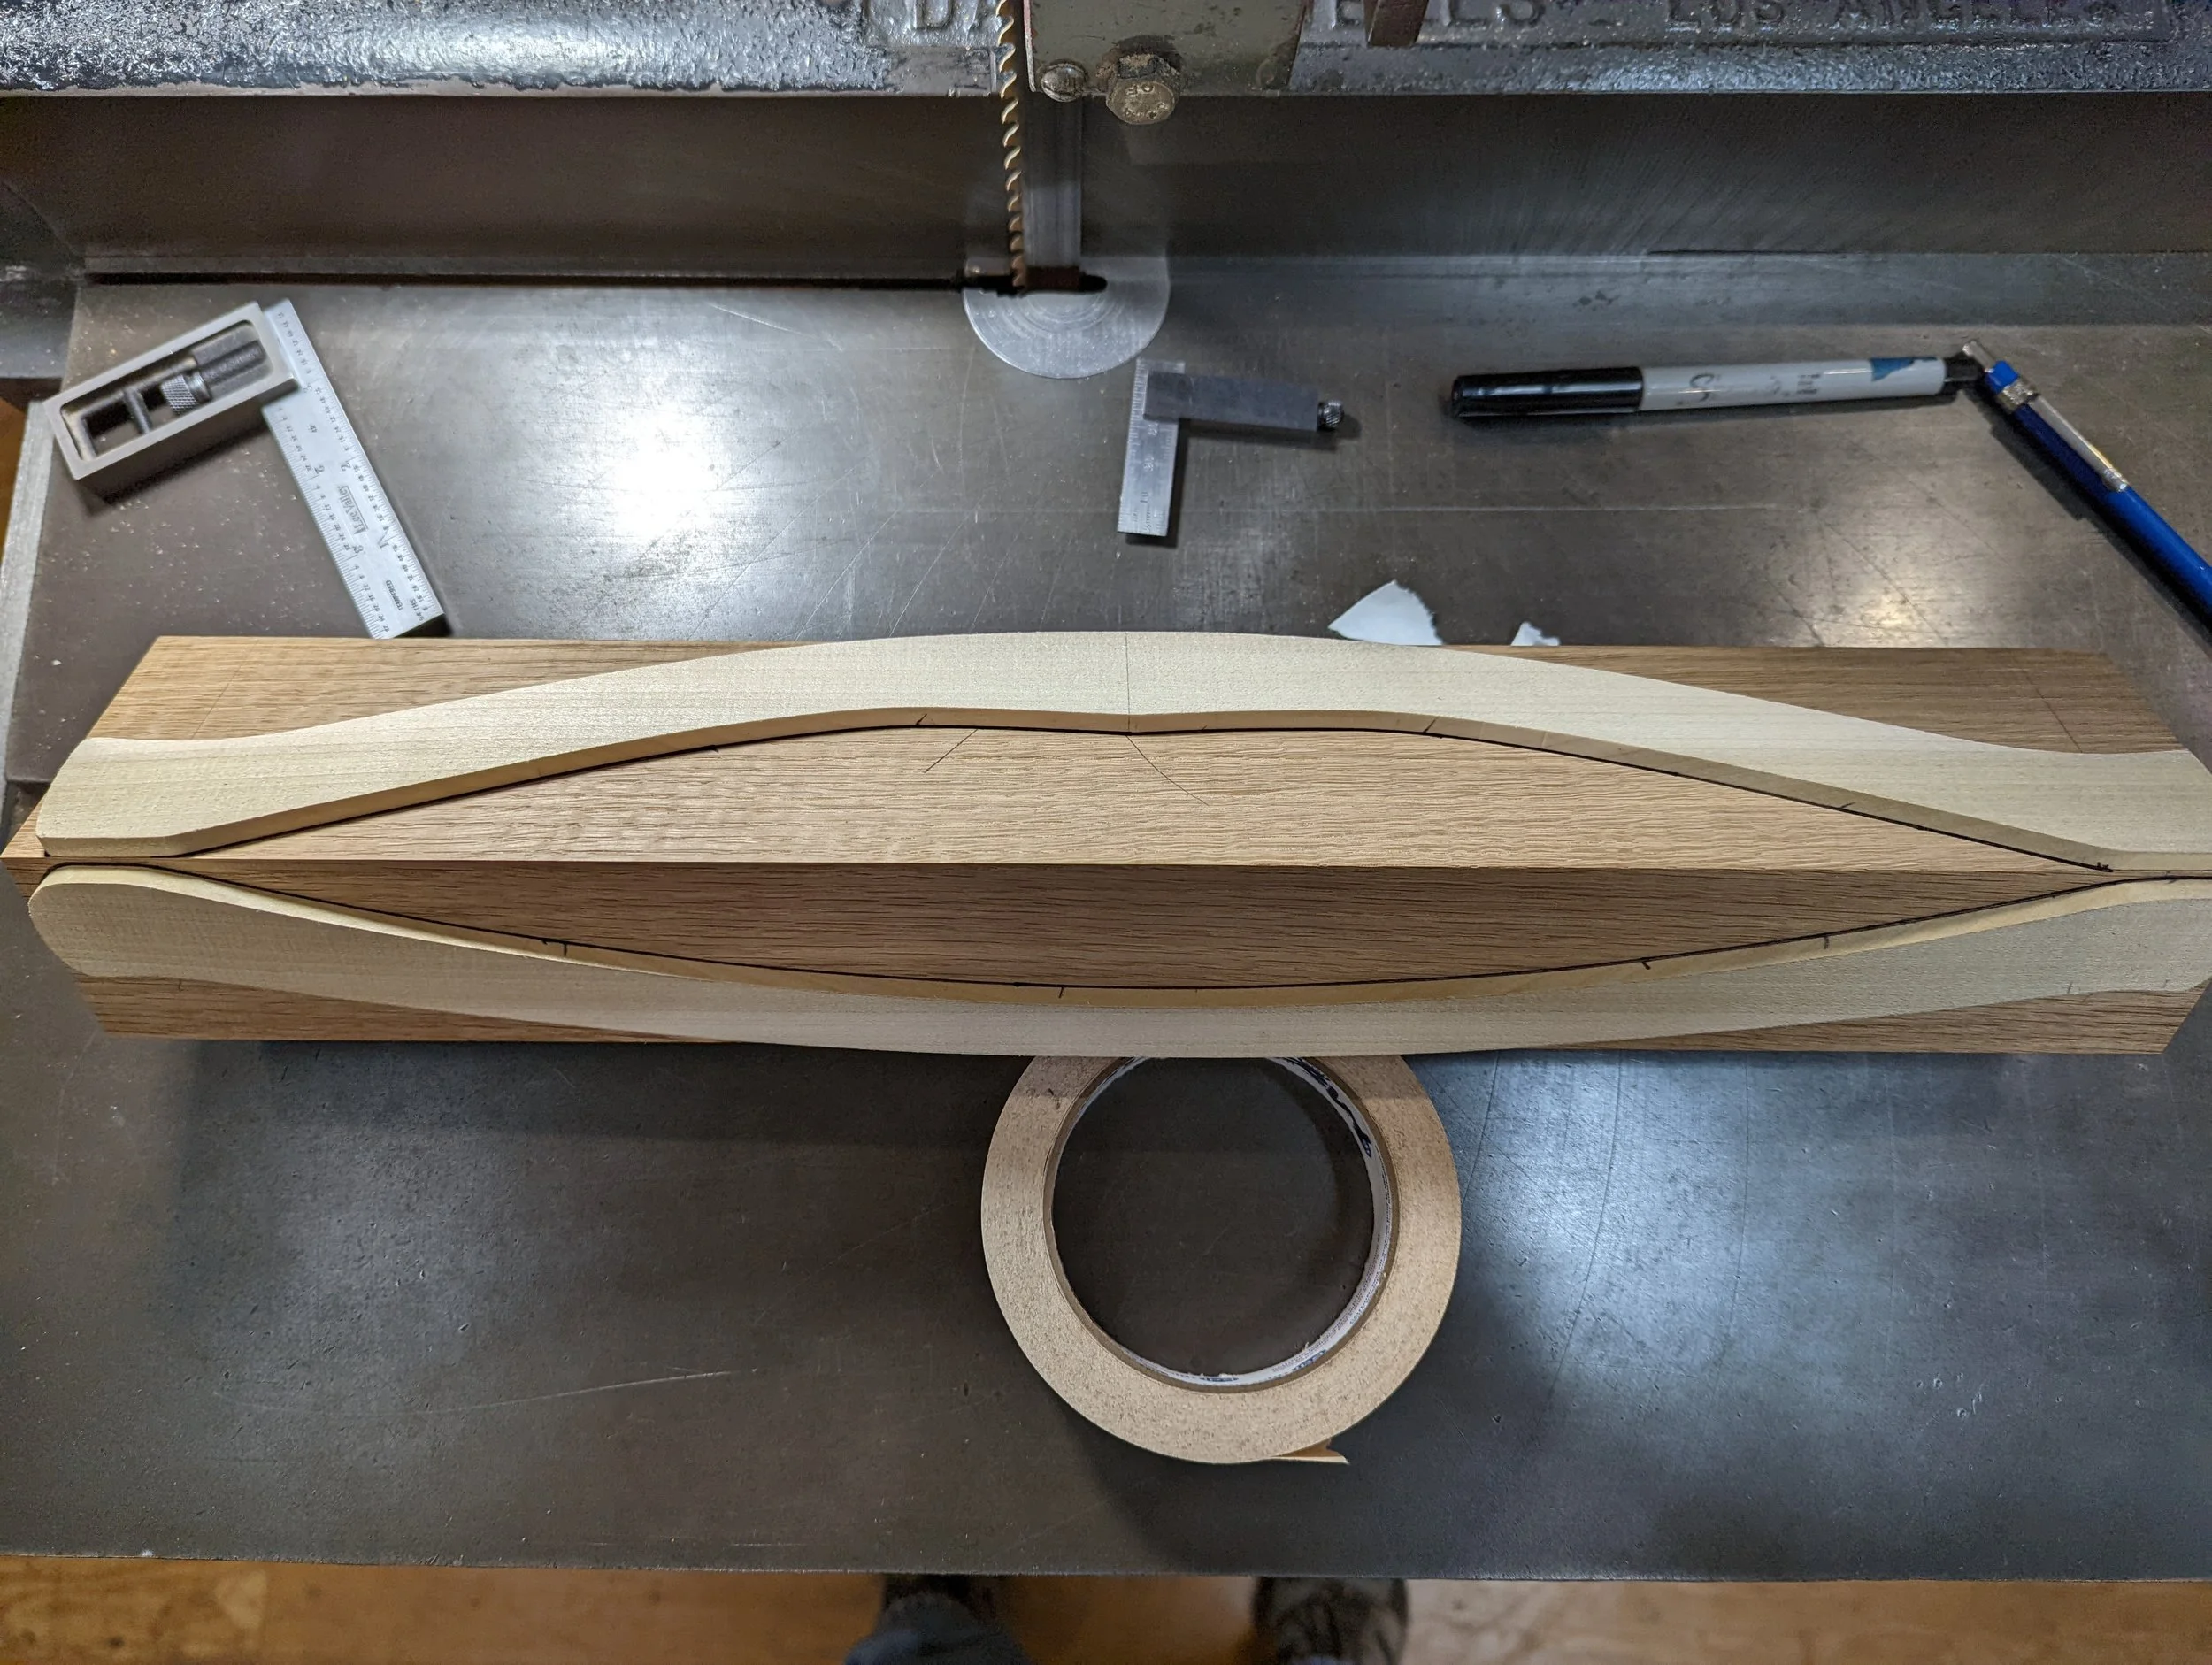
Here is an example of using a negative template to help in determining the positioning of the back legs from the slab.
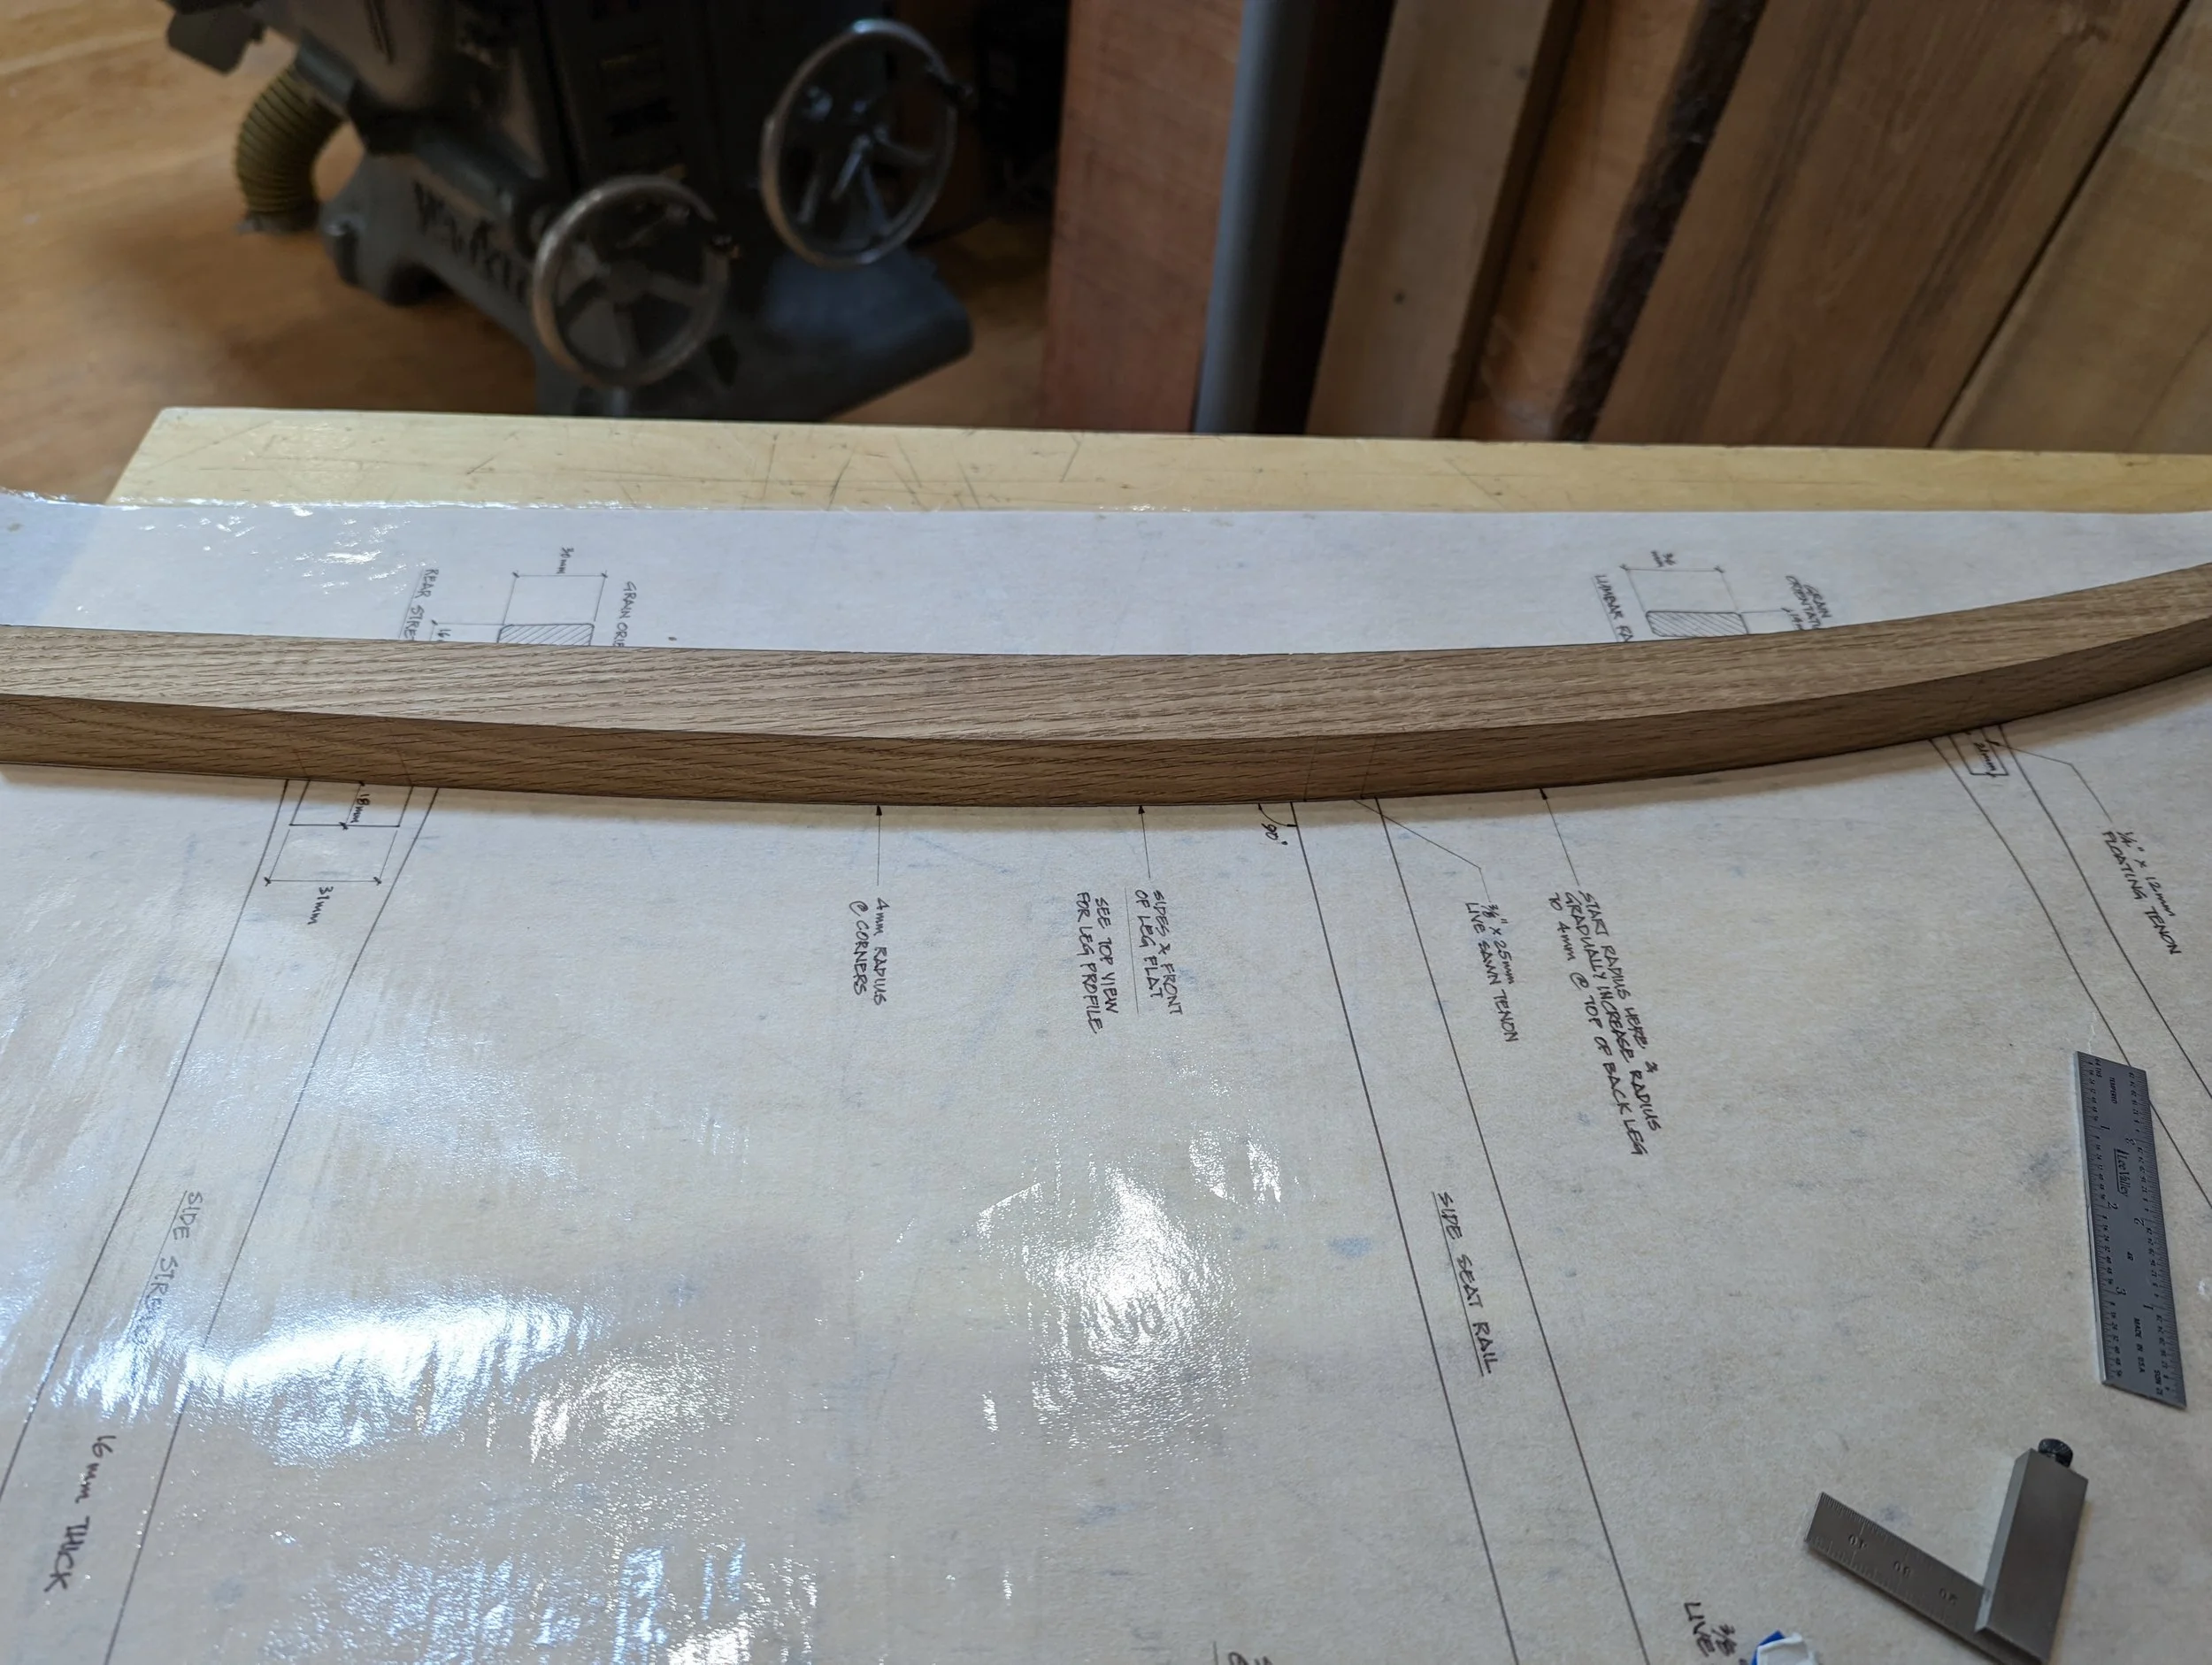
Grain graphics are an integral part of the design of this chair. By this I mean the grain lines follow and accentuate curved pieces and flow across the entire chair. This is achieved through ensuring all the required pieces are rift sawn (growth rings ideally 45° to the face of the board). In areas that are not rift sawn, the grain is rotated to create rift sawn. Negative templates sized to the ends of the various pieces were used to determine where a piece could be cut out of the slab.
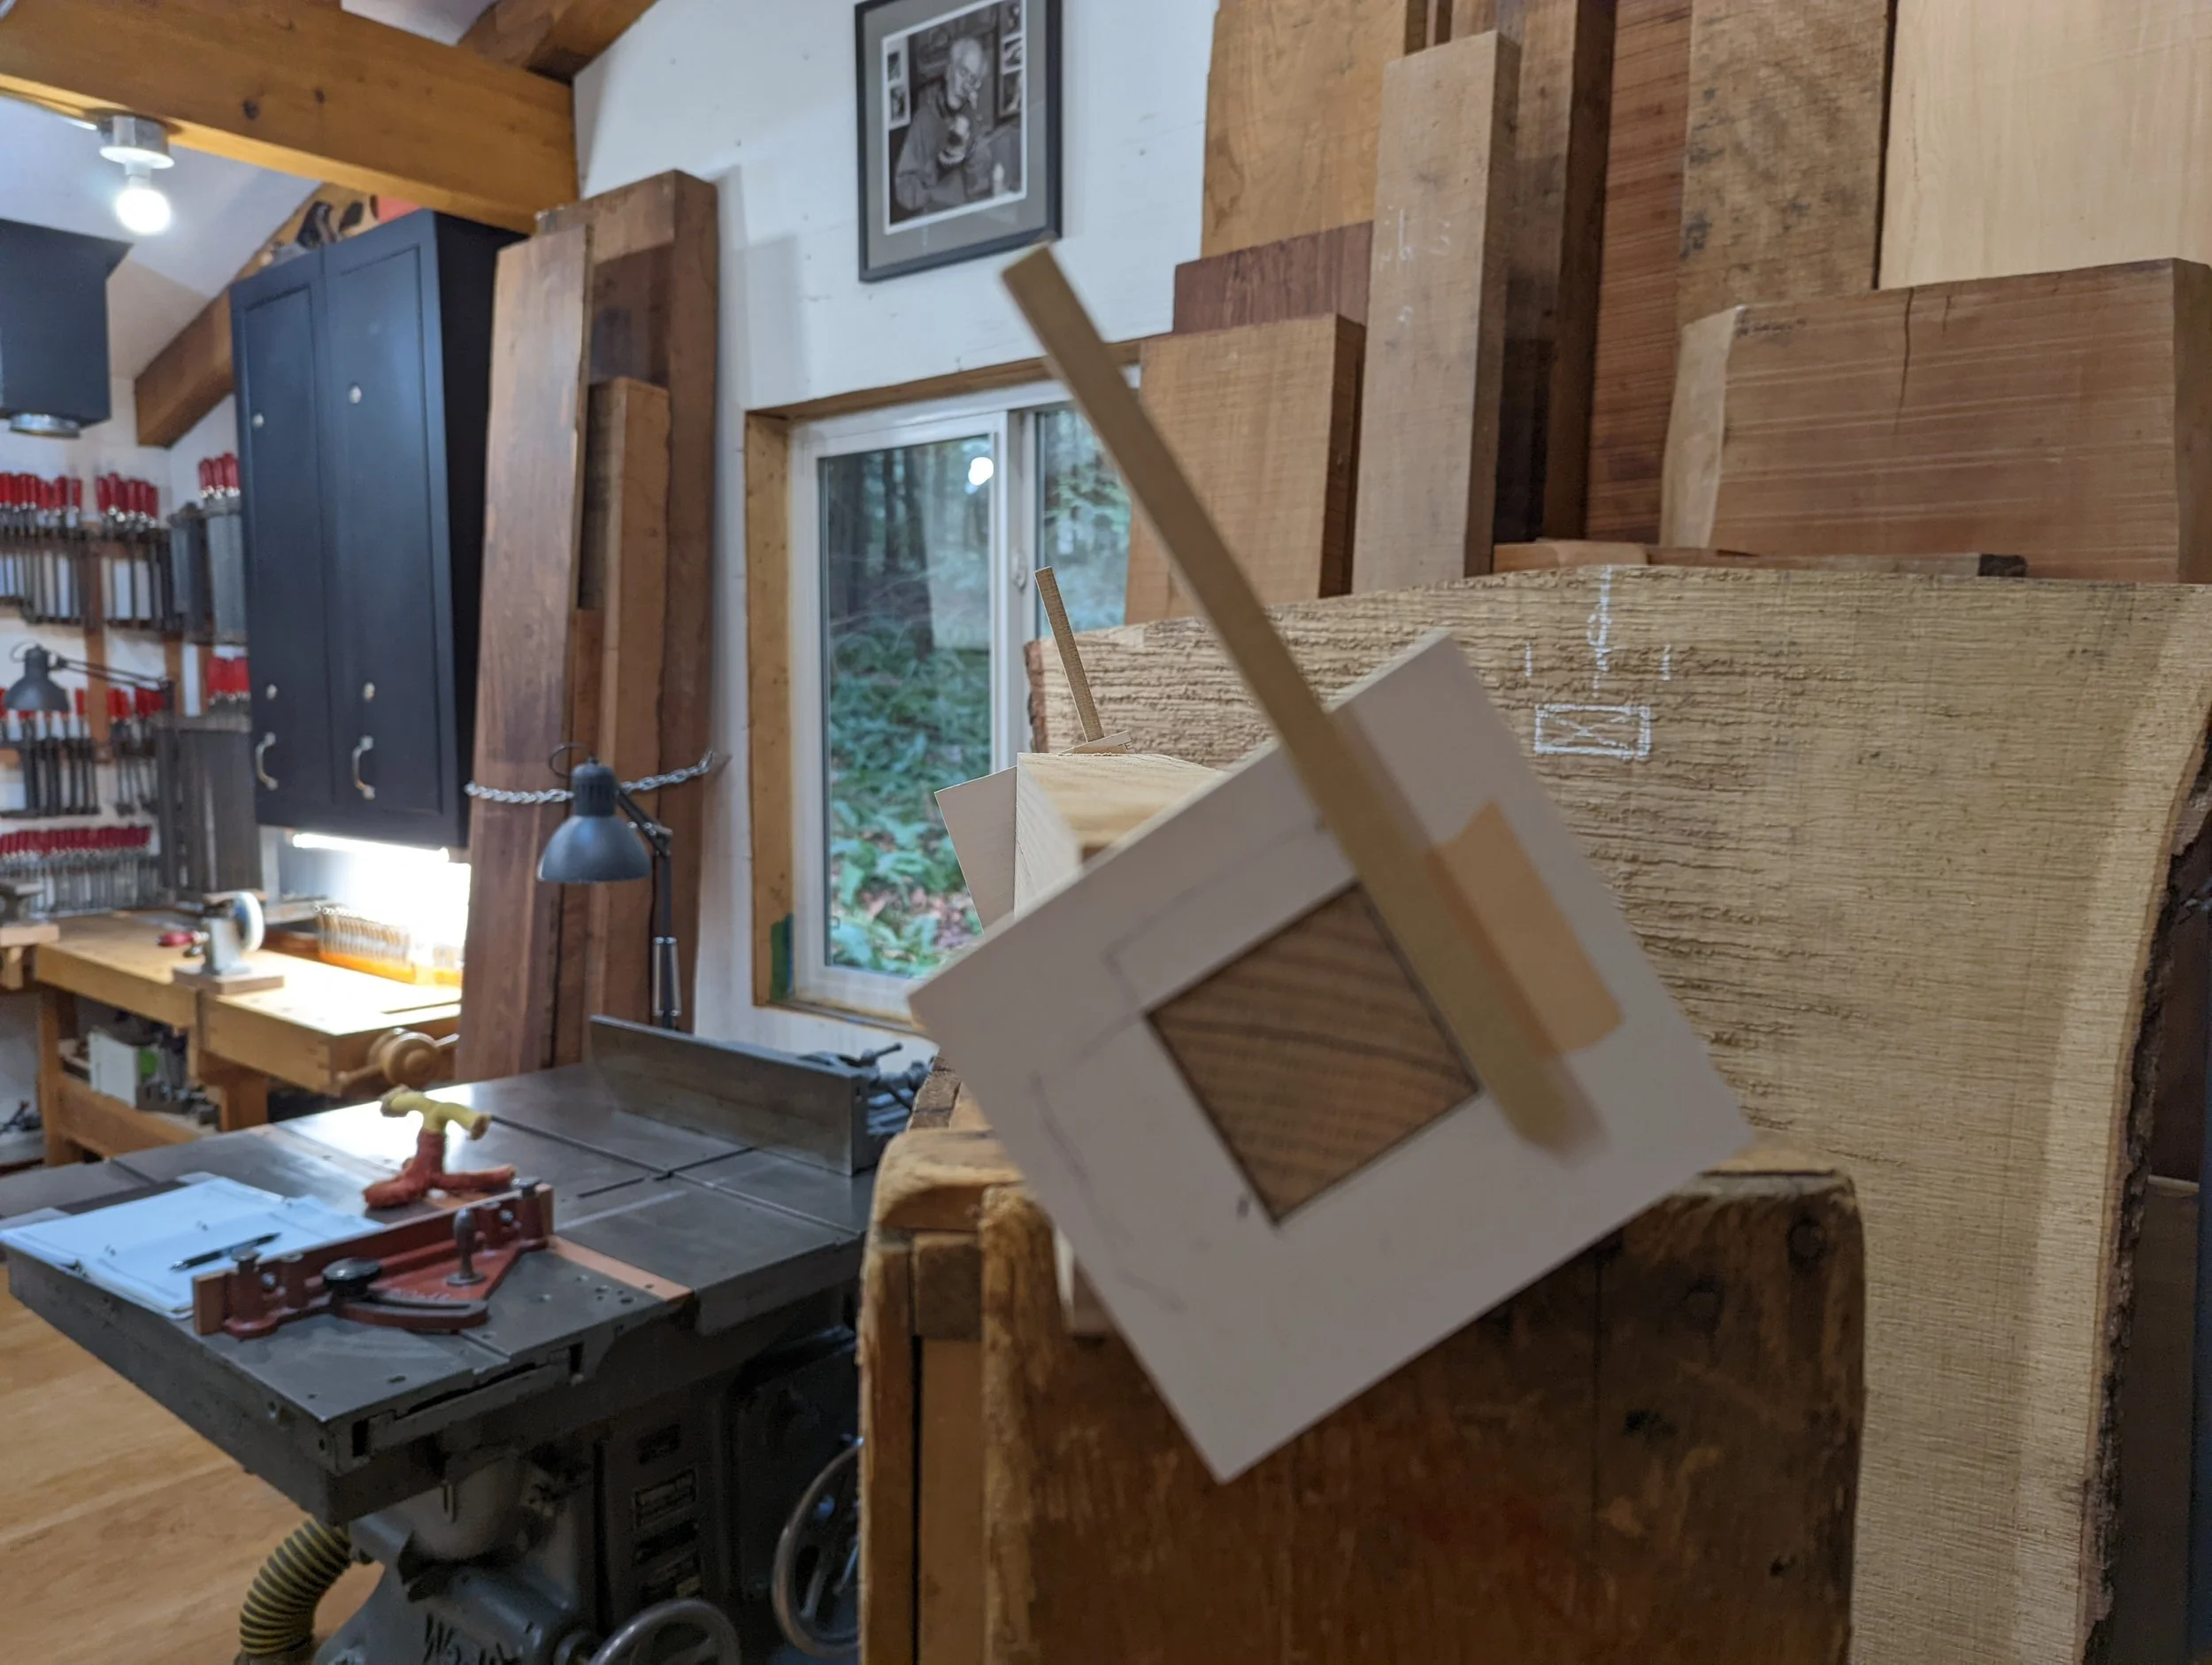
Here, I’m positioning the lower side stretchers for the chair. The blue lines are the cross section of the component with rift cut grain, the black lines are the cut lines.

All the cuts are done on the bandsaw slightly oversized and left to rest for a couple of days. The oak was well aged and acclimatized to the shop so there was very limited movement even though the components were cut from such a large plank.
The next step is to cut out the back legs on the bandsaw from the blanks and remove all the machining marks using a hand plane and spokeshave. Care is taken to ensure the areas with mortises are flat and perpendicular to outside surface of the leg. This helps immensely in the fitting of the tenon shoulders later on.

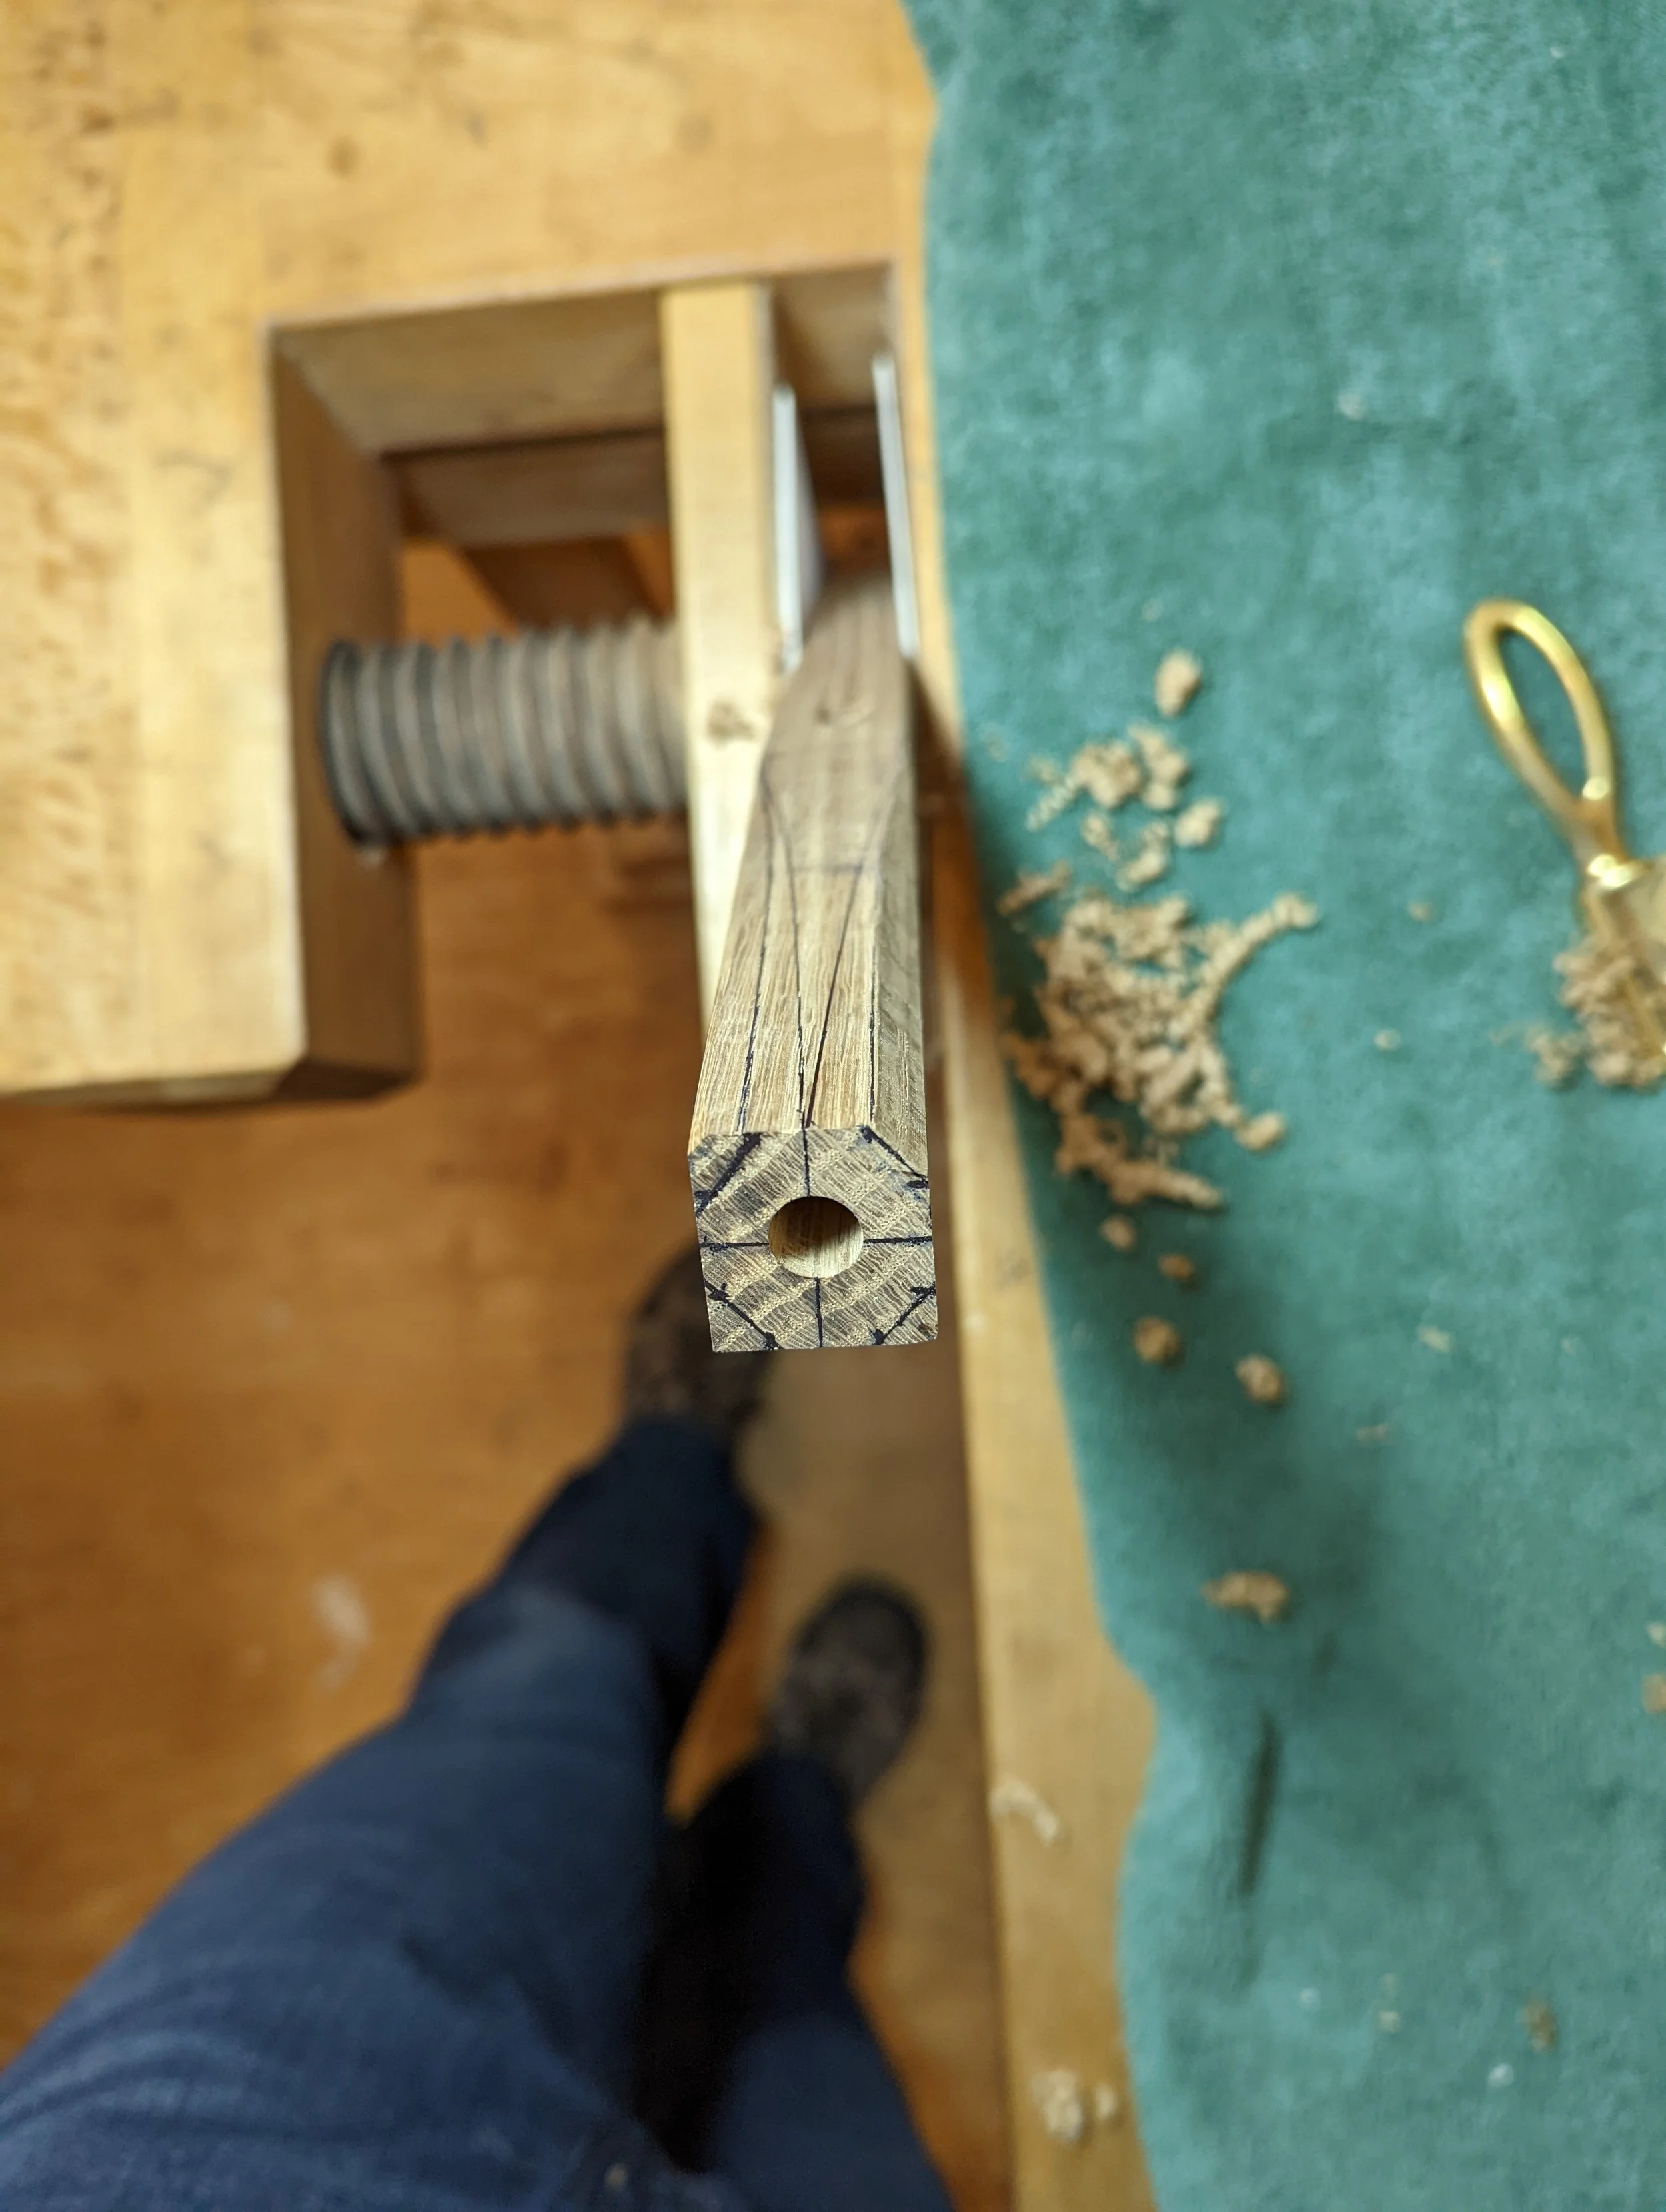
Here I’m using a template to mark out locations for mortises and crosscuts for the back legs. These mortises are for the lumbar rail, rear seat rail and lower stretcher. They are cut using an XY mortiser.
Mortise locations are layed out on the fronts of the back legs for the arms, side seat rails and lower side stretchers. These are angled mortises as the front of the seat is slightly higher than the rear seat rail. These angles are determined from the full sized drawings.
A similar methodology is followed to lay out and cut mortises on the front legs.
Front and back legs with mortises cut.

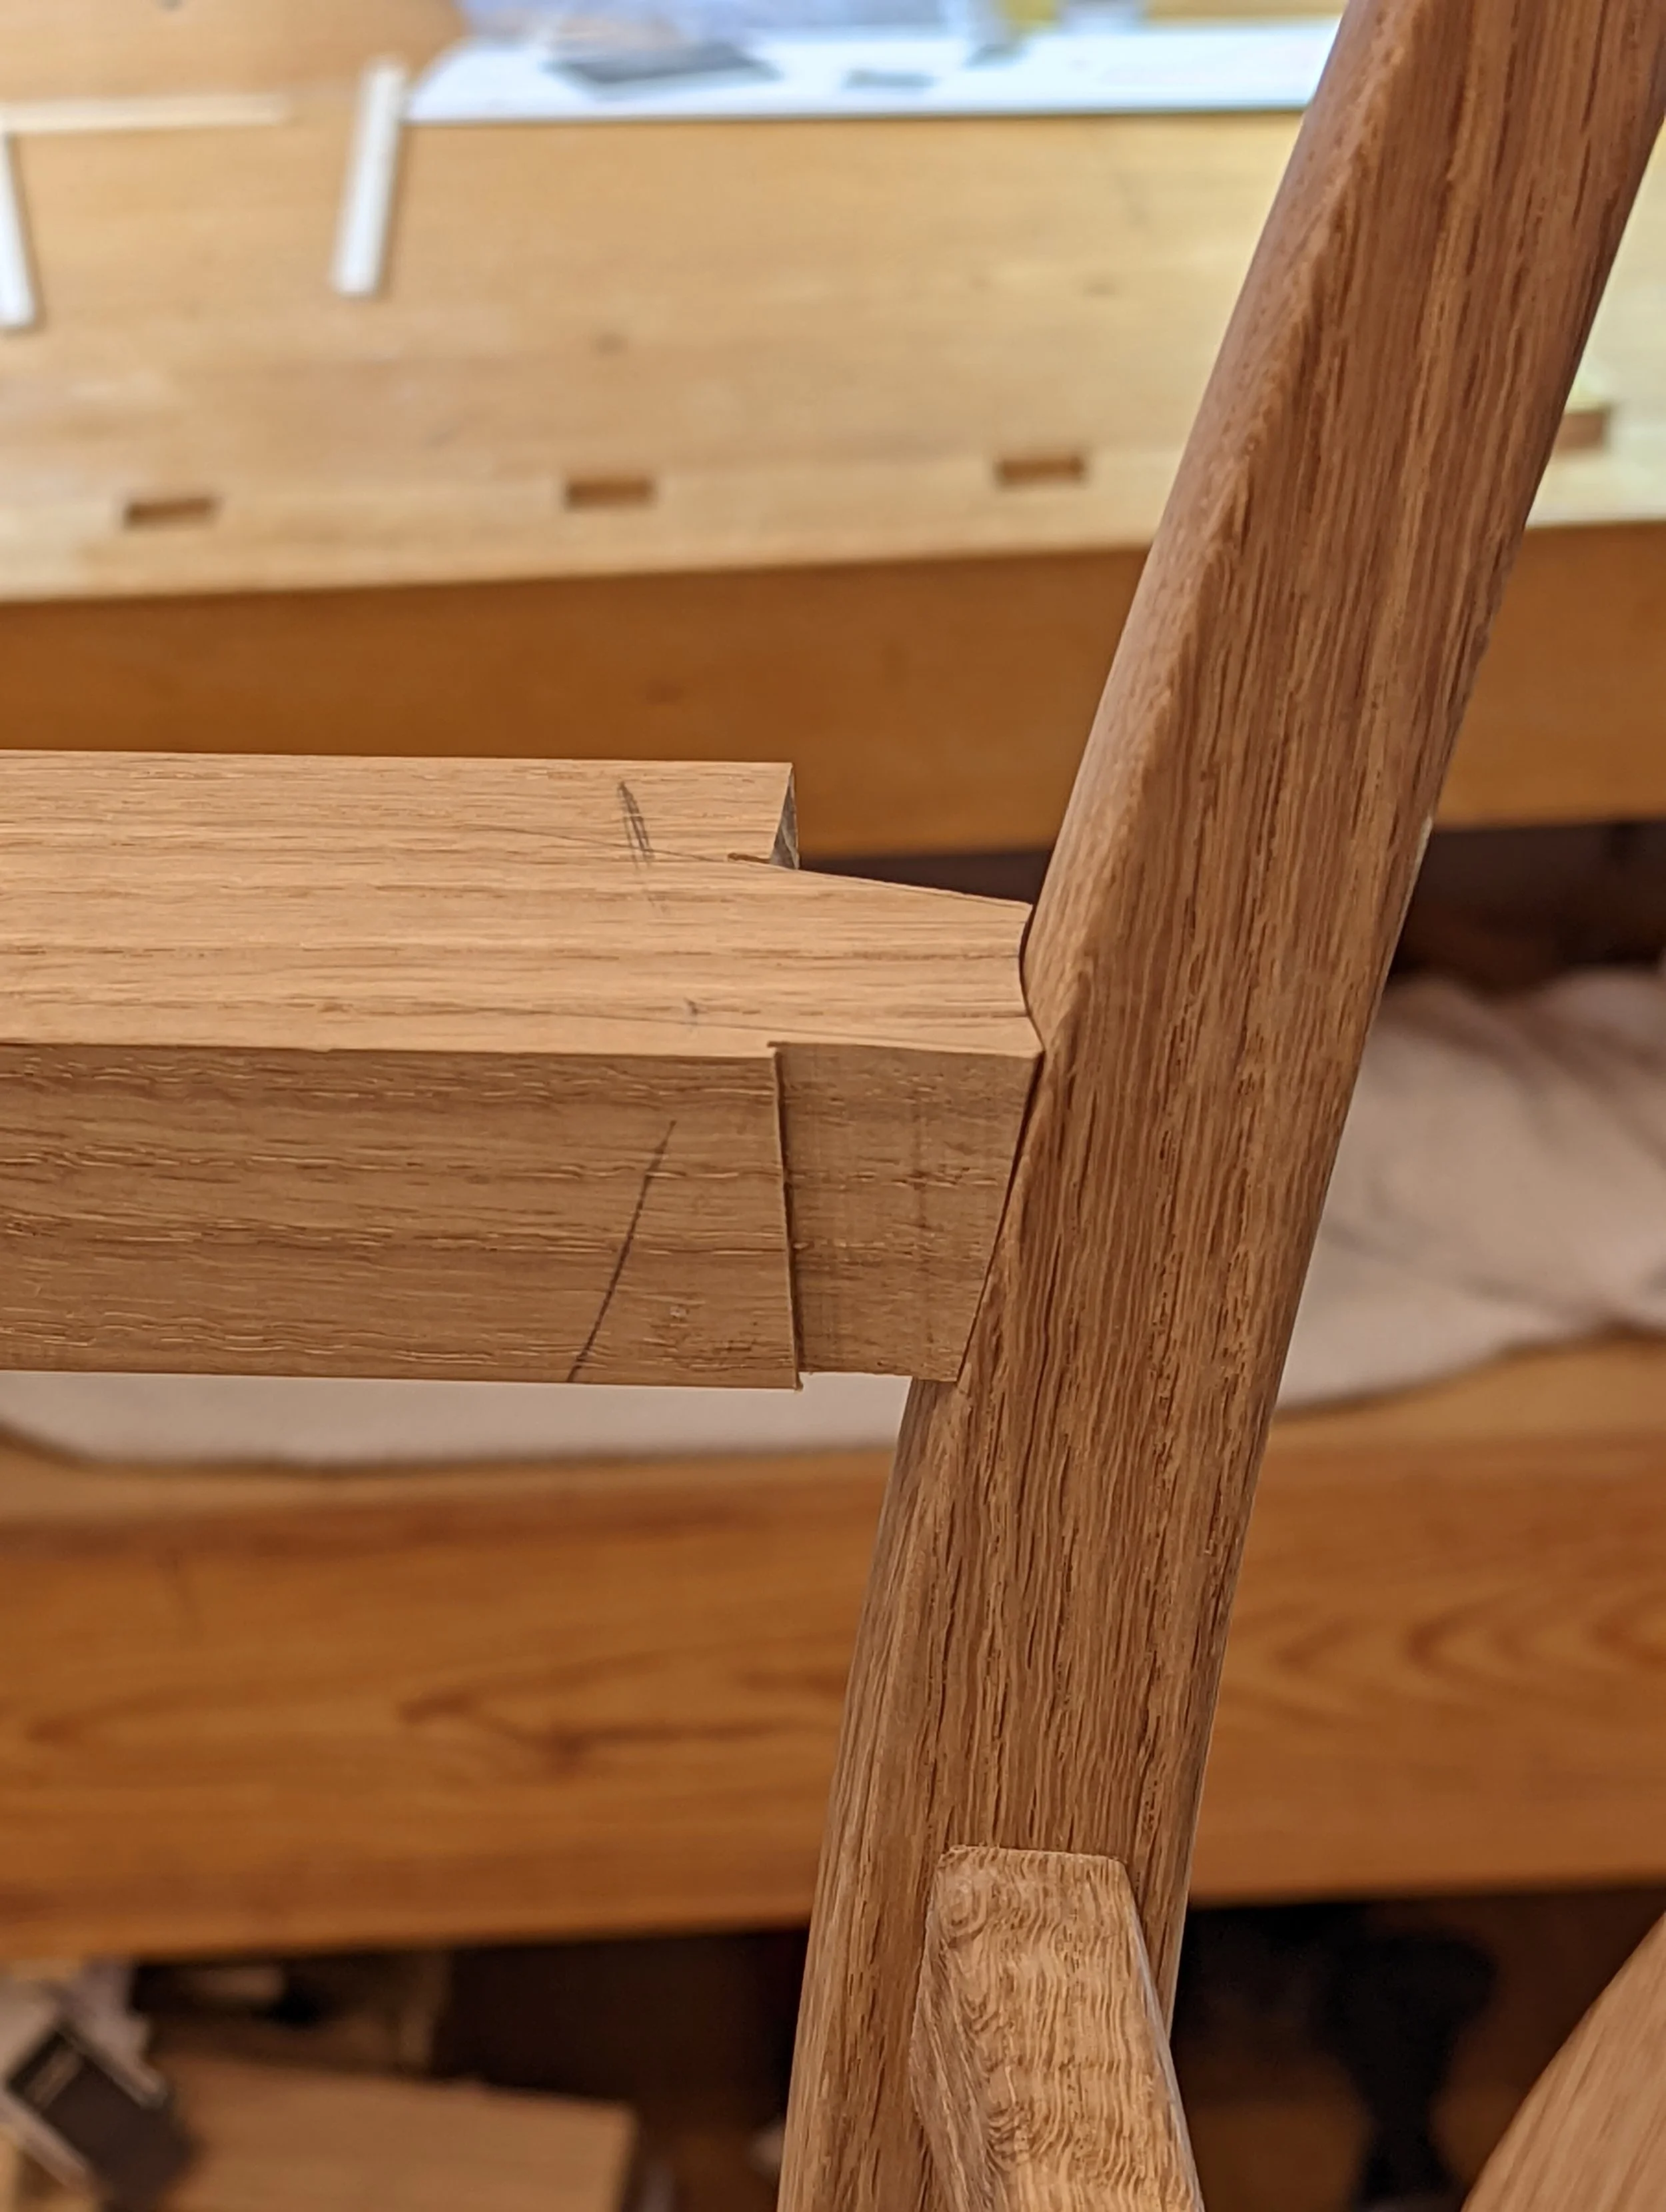
Once all the mortises for the front and back legs are done, its on to the back assembly. This consists of the 2 back legs, rear seat rail, lumbar rail and lower stretcher. All the shaping is done on the back legs at this time and is essentially a finished surface. Each tenon and shoulder is individually fitted to its mortise to ensure there are no gaps in the joinery. As everything affects everything, getting all 6 joints to be perfect with no gaps is a challenge. Here is the glued up back assembly after 5 weeks worth of work.

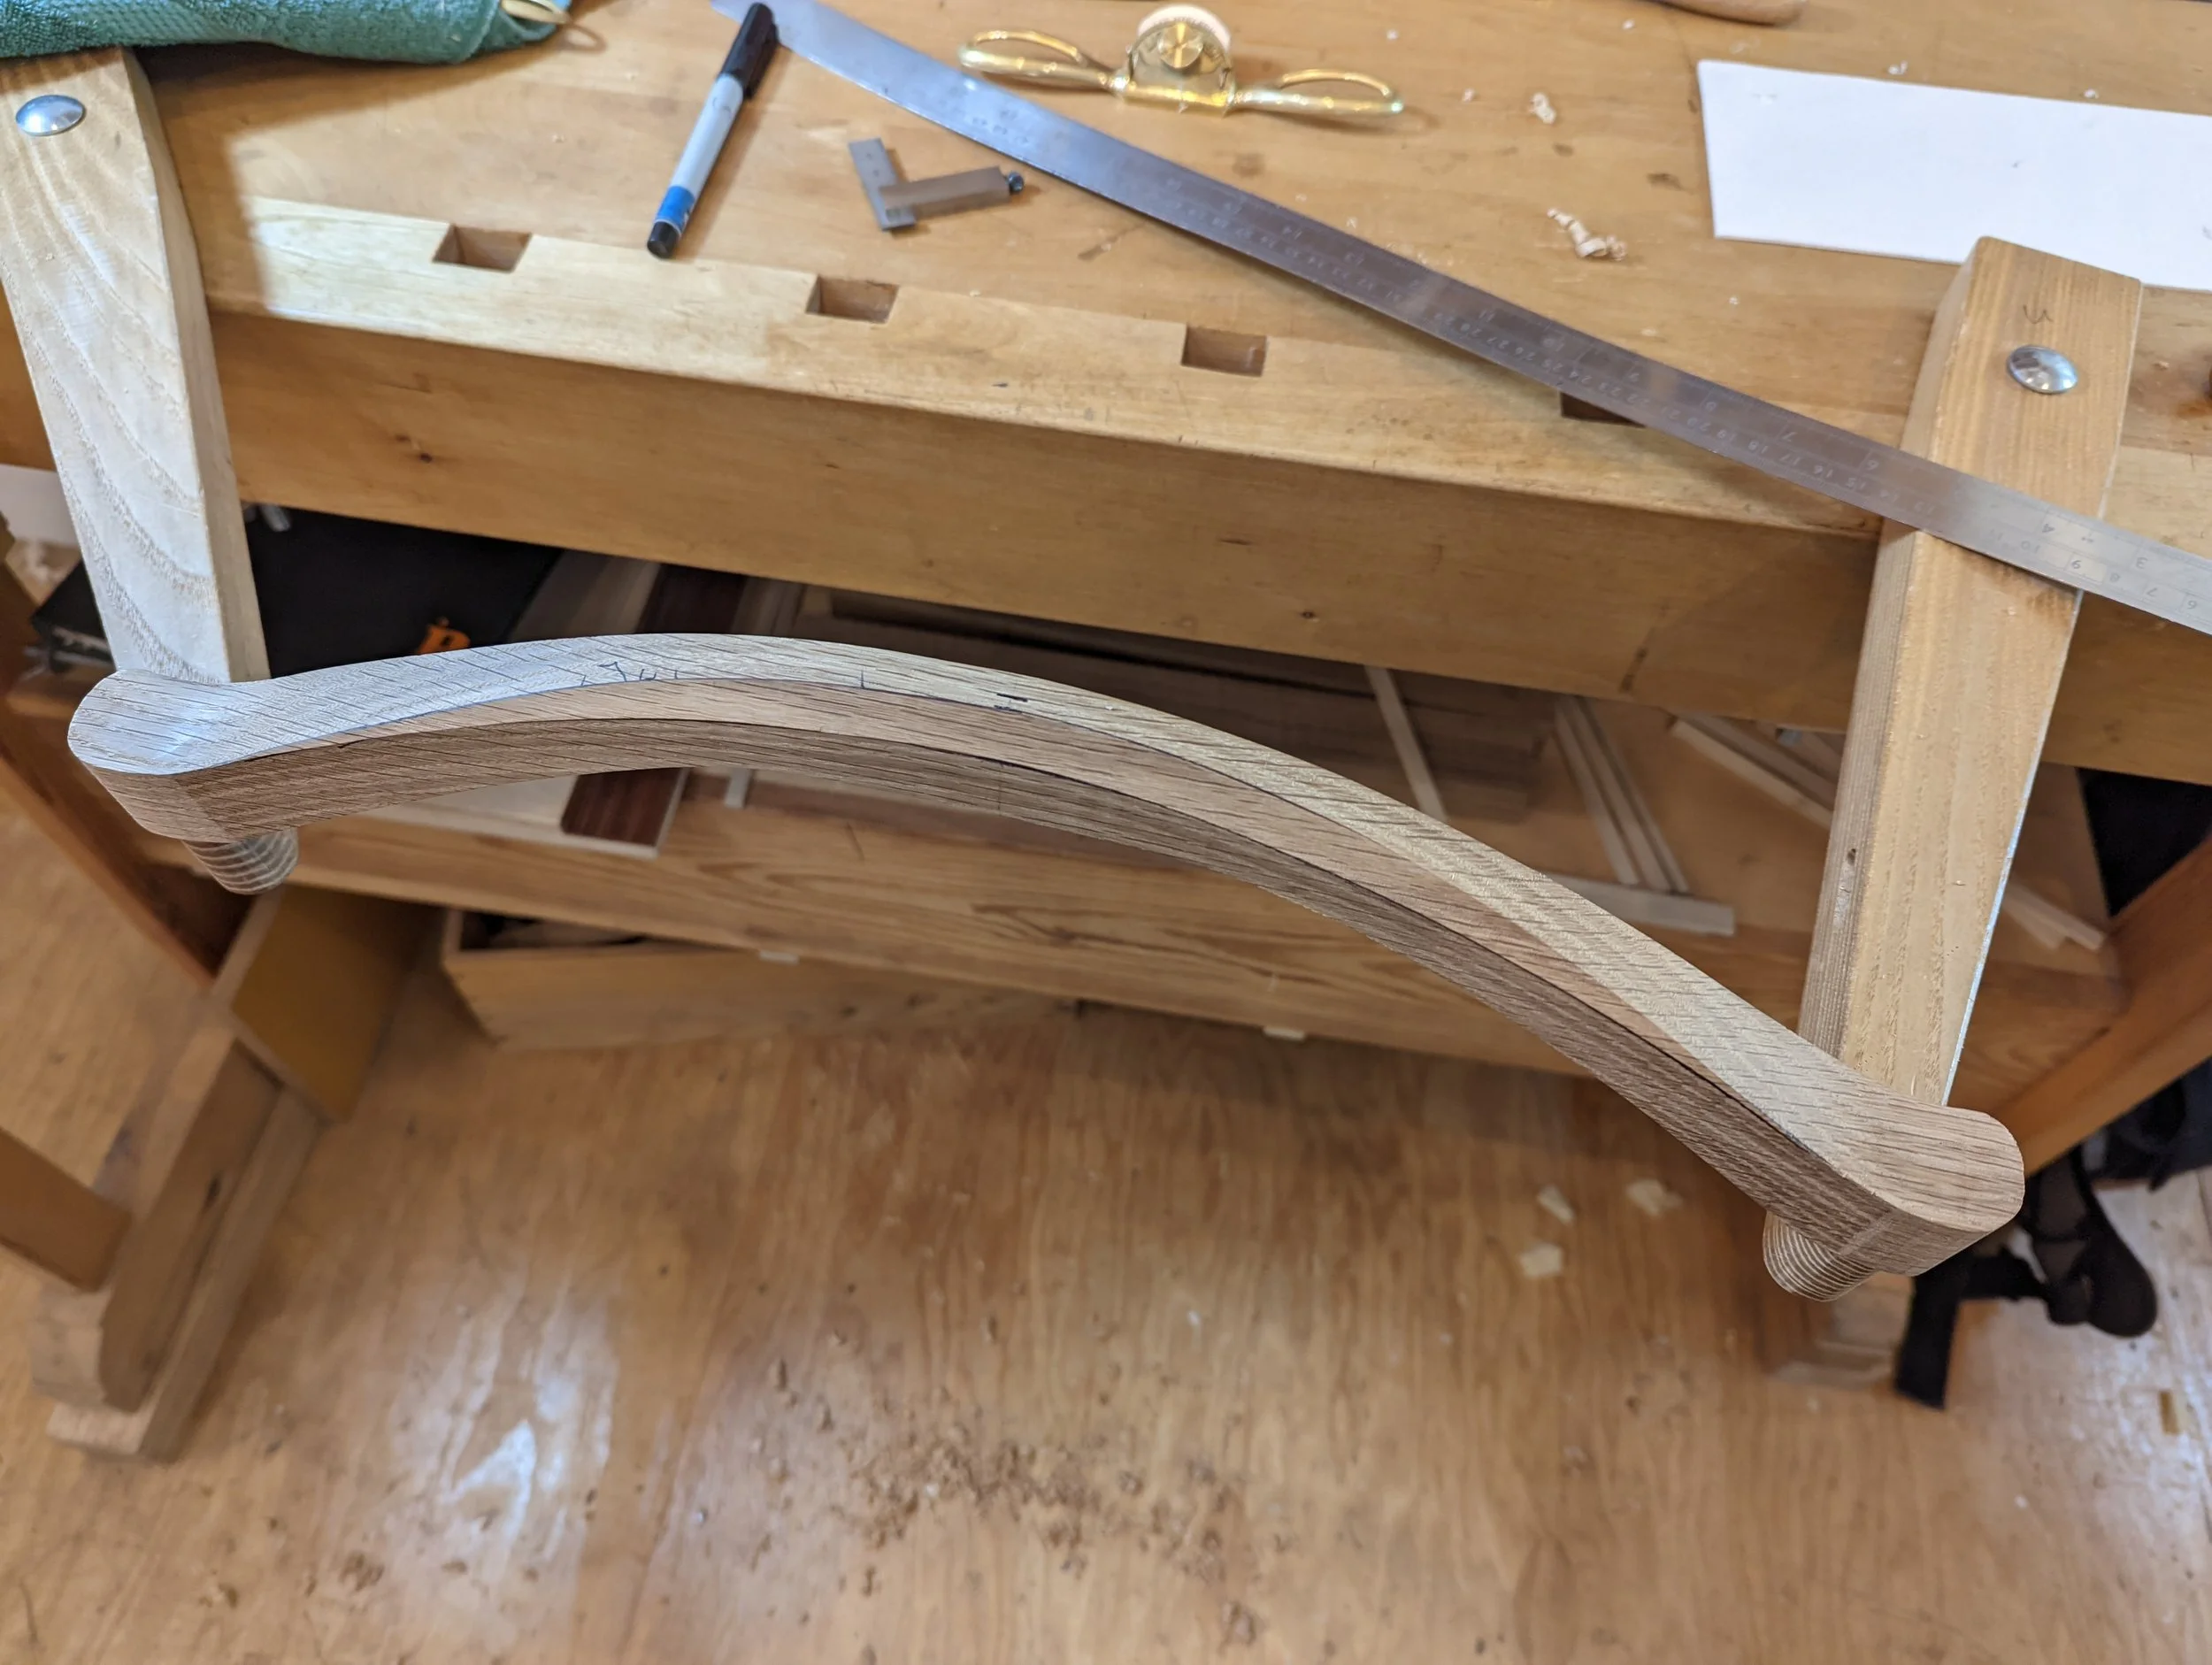
One of the most enjoyable parts of the chair is shaping the front legs. They start out as a rectangular shape on the bottom and end up as a slight oval at the top where the arms join to the front legs. All of this is done with a spokeshave.
The glue up of the front assembly, consisting of the 2 front legs, front seat rail and front stretcher.

Next up are the side rails. The front of the seat is slightly higher and wider than the back of the seat, plus the front legs are slightly cantered towards the back legs. This makes for compound angled tenons on the side rails and lower stretchers.
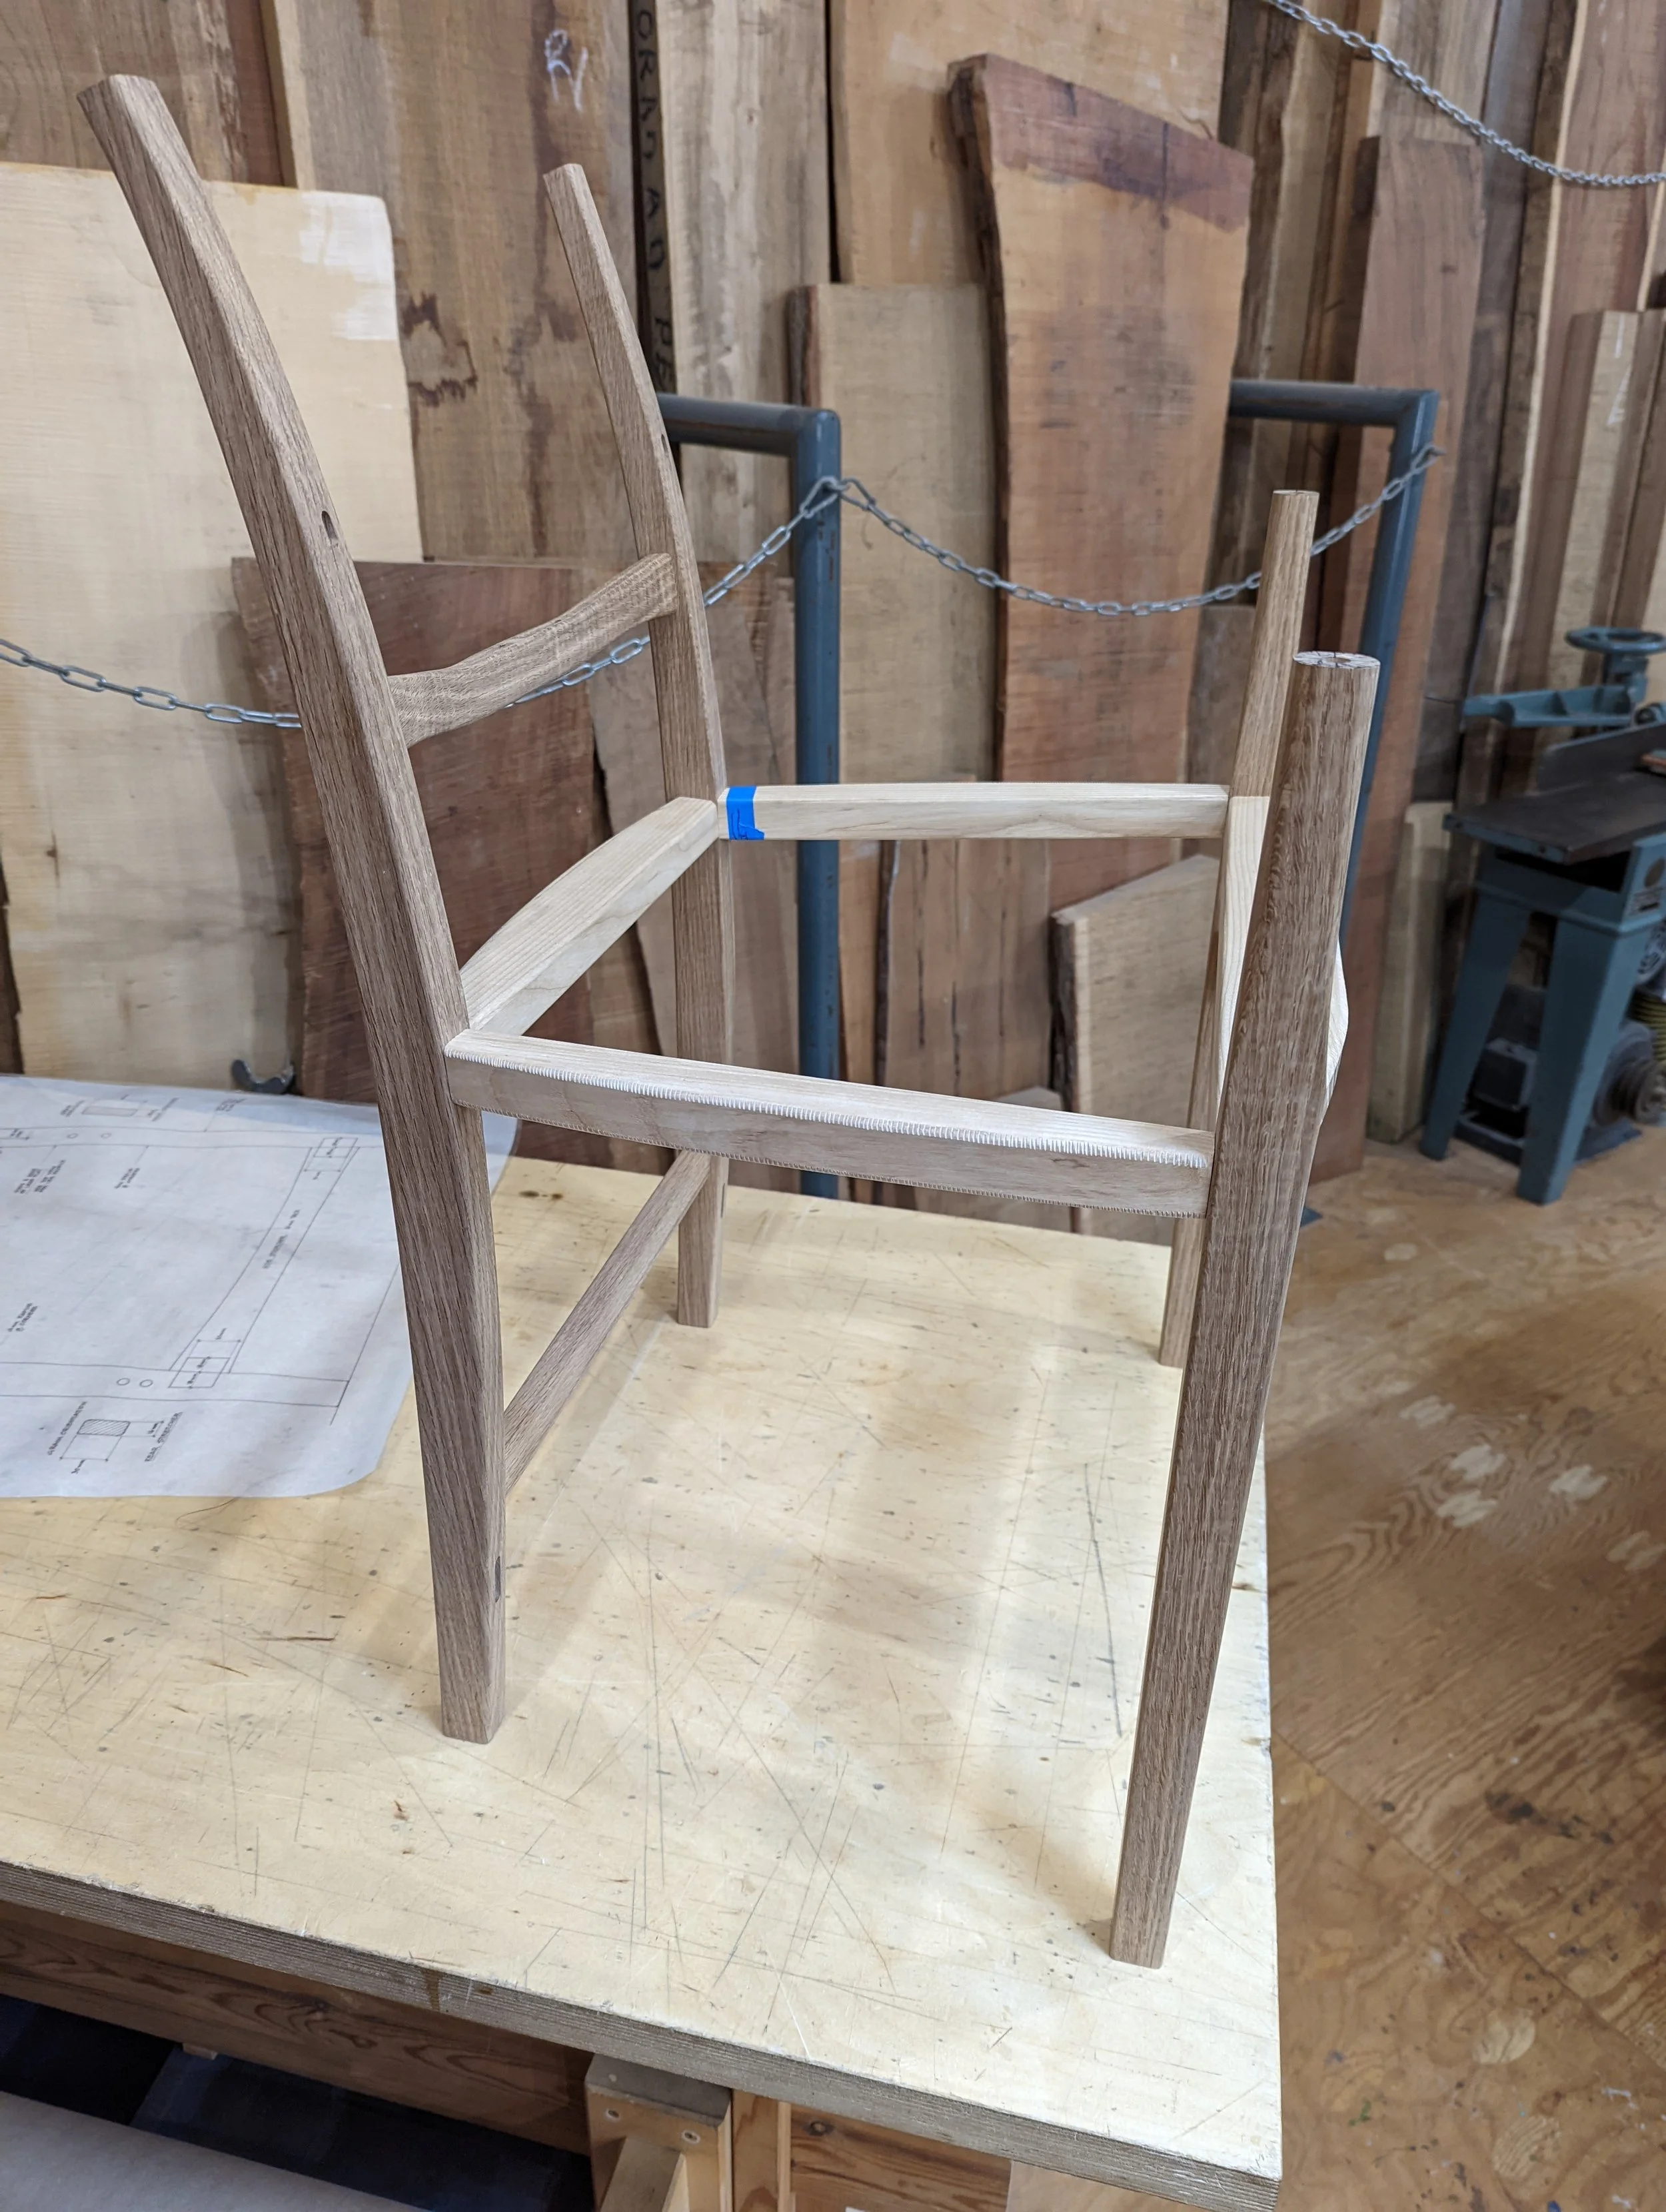
Glue up of front and back assemblies. This involves the 2 side seat rails and 2 lower stretchers

While the glue is curing and everything is clamped up, its time to start on the signature piece of the chair, the crest rail. Here templates are used to trace the cut out lines on the crest rail blank. The piece is cut out on the bandsaw.
Once cut out, shaping begins on the crest rail. A series of facets is created using a spokeshave then blended in to give the finished surface.
Detail showing the grain pattern of the crest rail.
With the crest rail shaped and mortises cut, the back slats are next. This was probably the most challenging part of the chair for me. Tenons need to be cut to match up with mortises in the lumbar and crest rails. This is another complex joint as the rails are on different planes, the back slats are curved in both the vertical and horizontal axis and the mortises on the crest rail are also on an angle.
Story sticks as shown below are used to determine the relative angles of both the lumbar rail and crest rail. This is used to set the table saw arbor angle for the back slat tenon shoulders.

Test fitting the roughed out back slats. While you can do the initial shoulder cuts for the upper tenons on the table saw, the final cutting and fitting are done with a hand saw and chisel due to the crest rail mortises being on an angle.

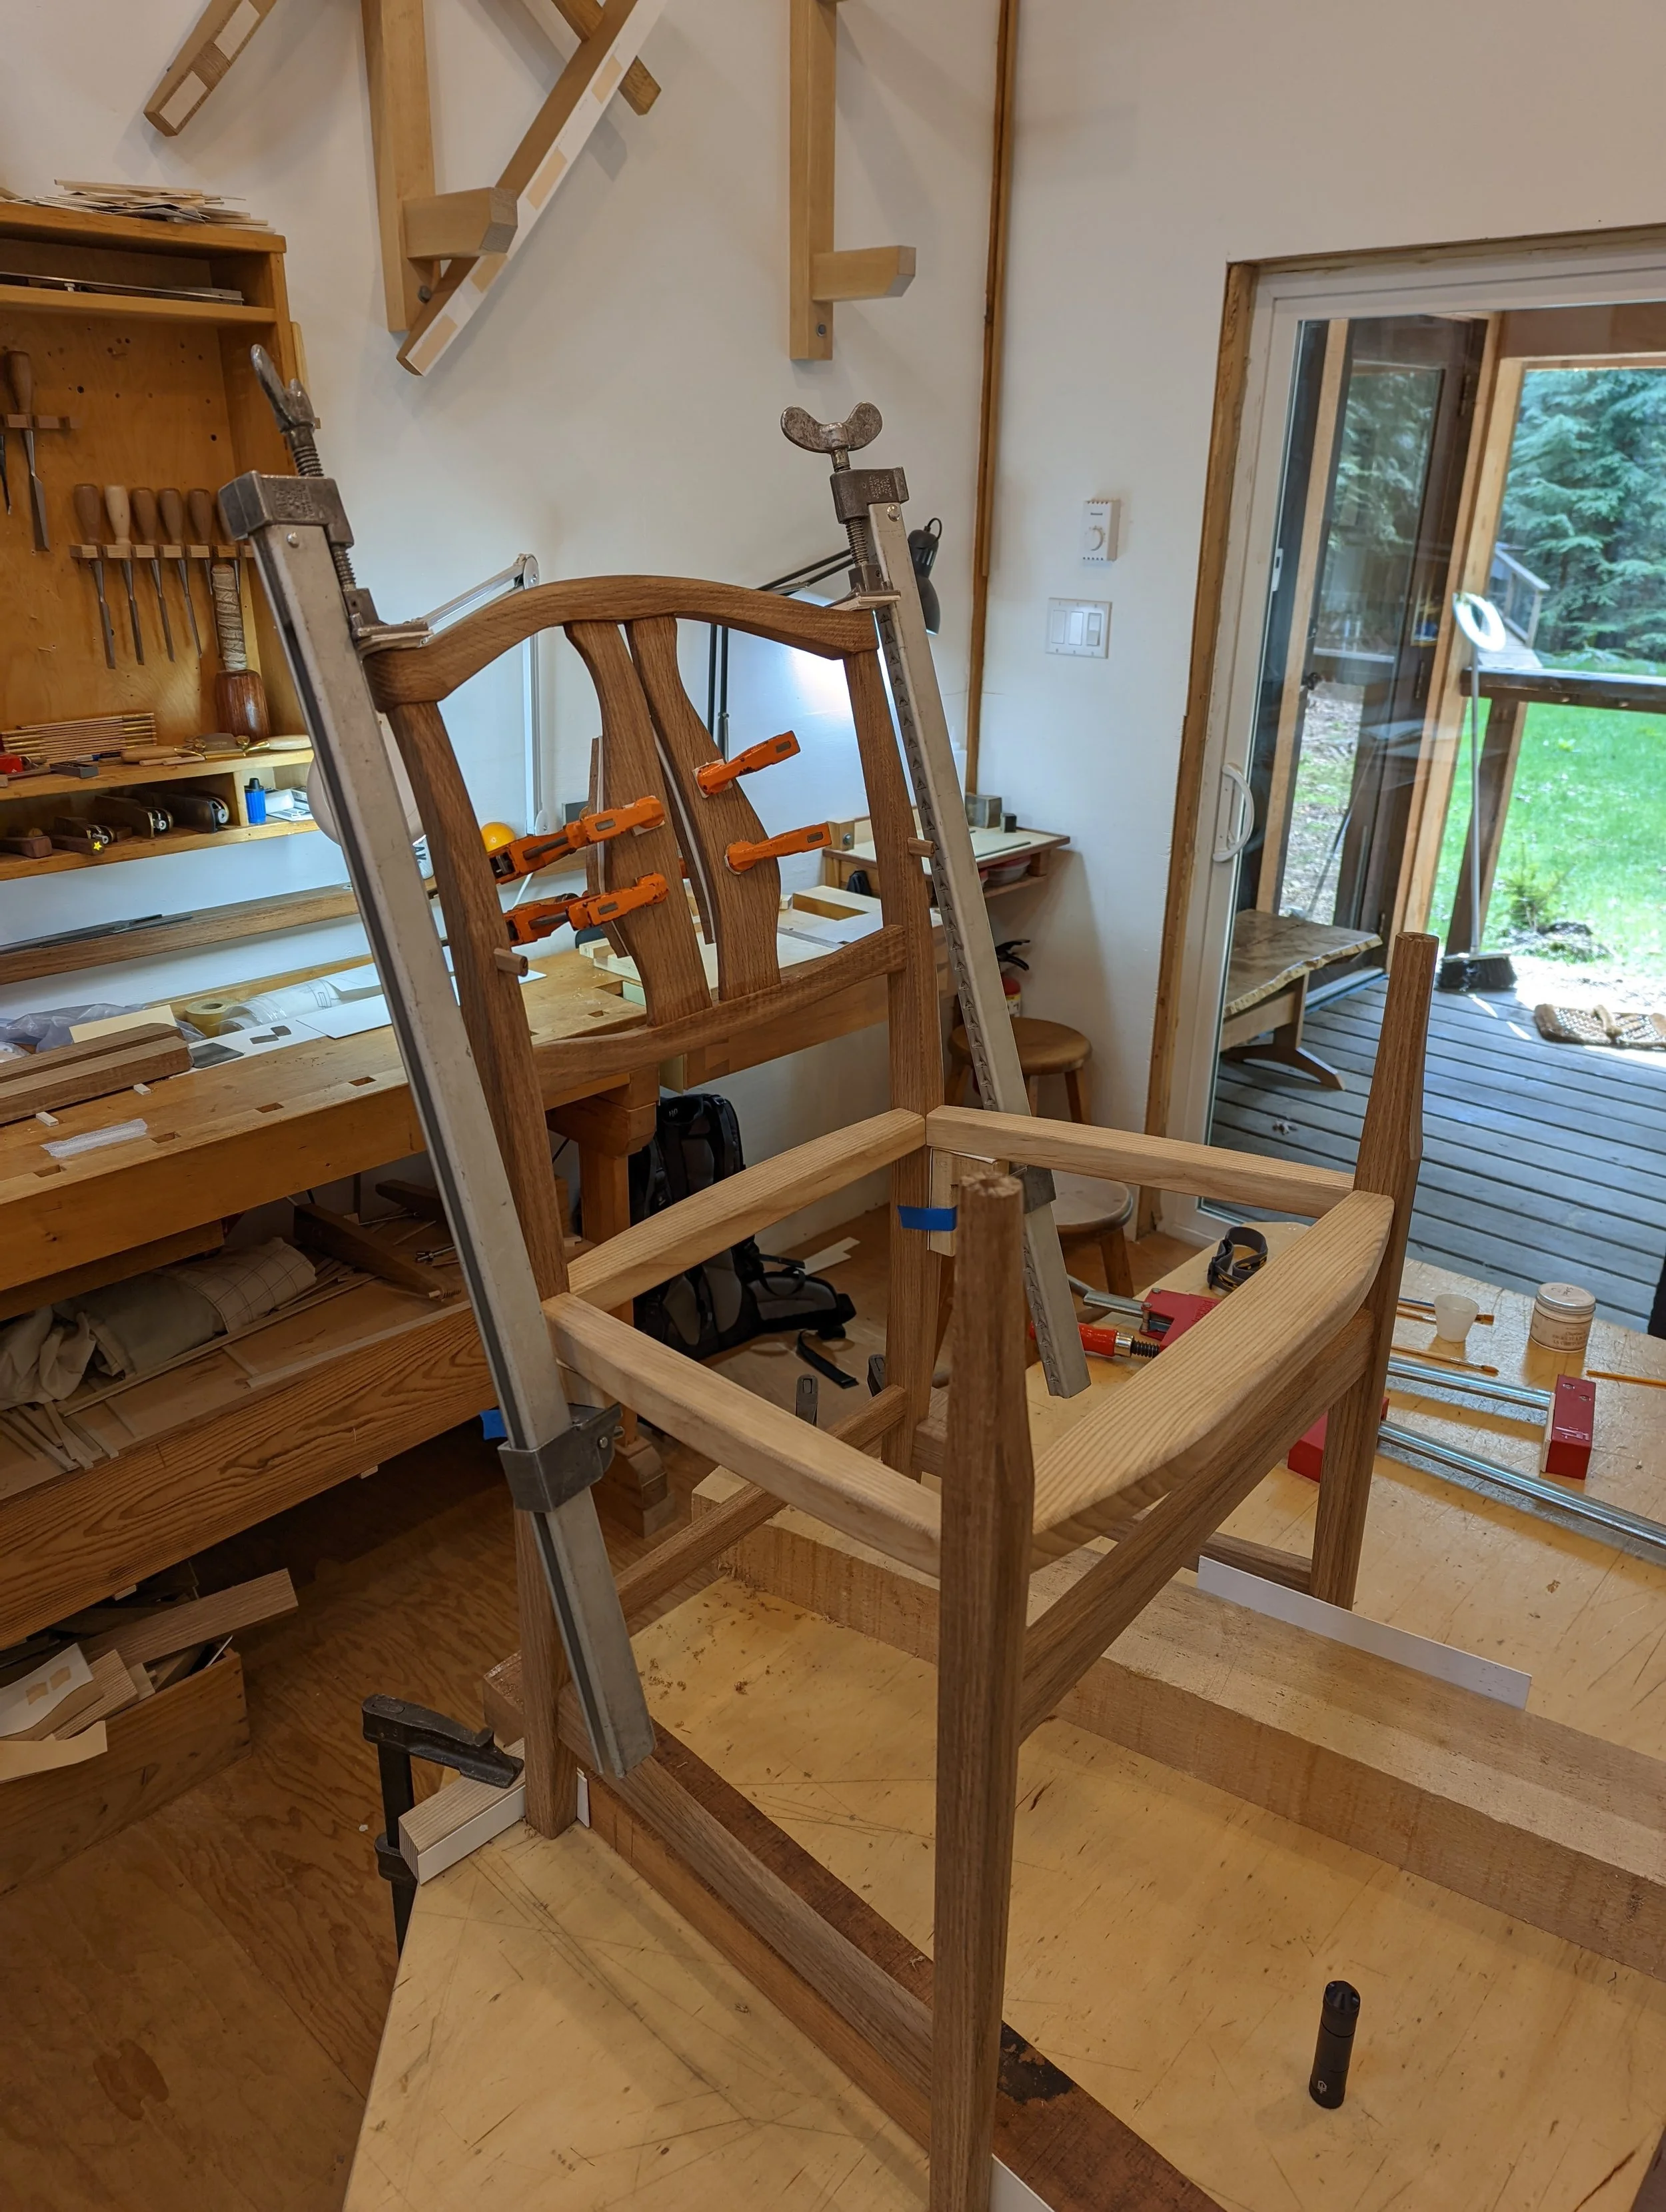
There are six joints that need to come together for this glue up. As everything affects everything, a change to one tenon shoulder will affect all the rest of the joints. Patience was definitely required! The fitting process took me close to a week to get it right, with the glue up being a major milestone.
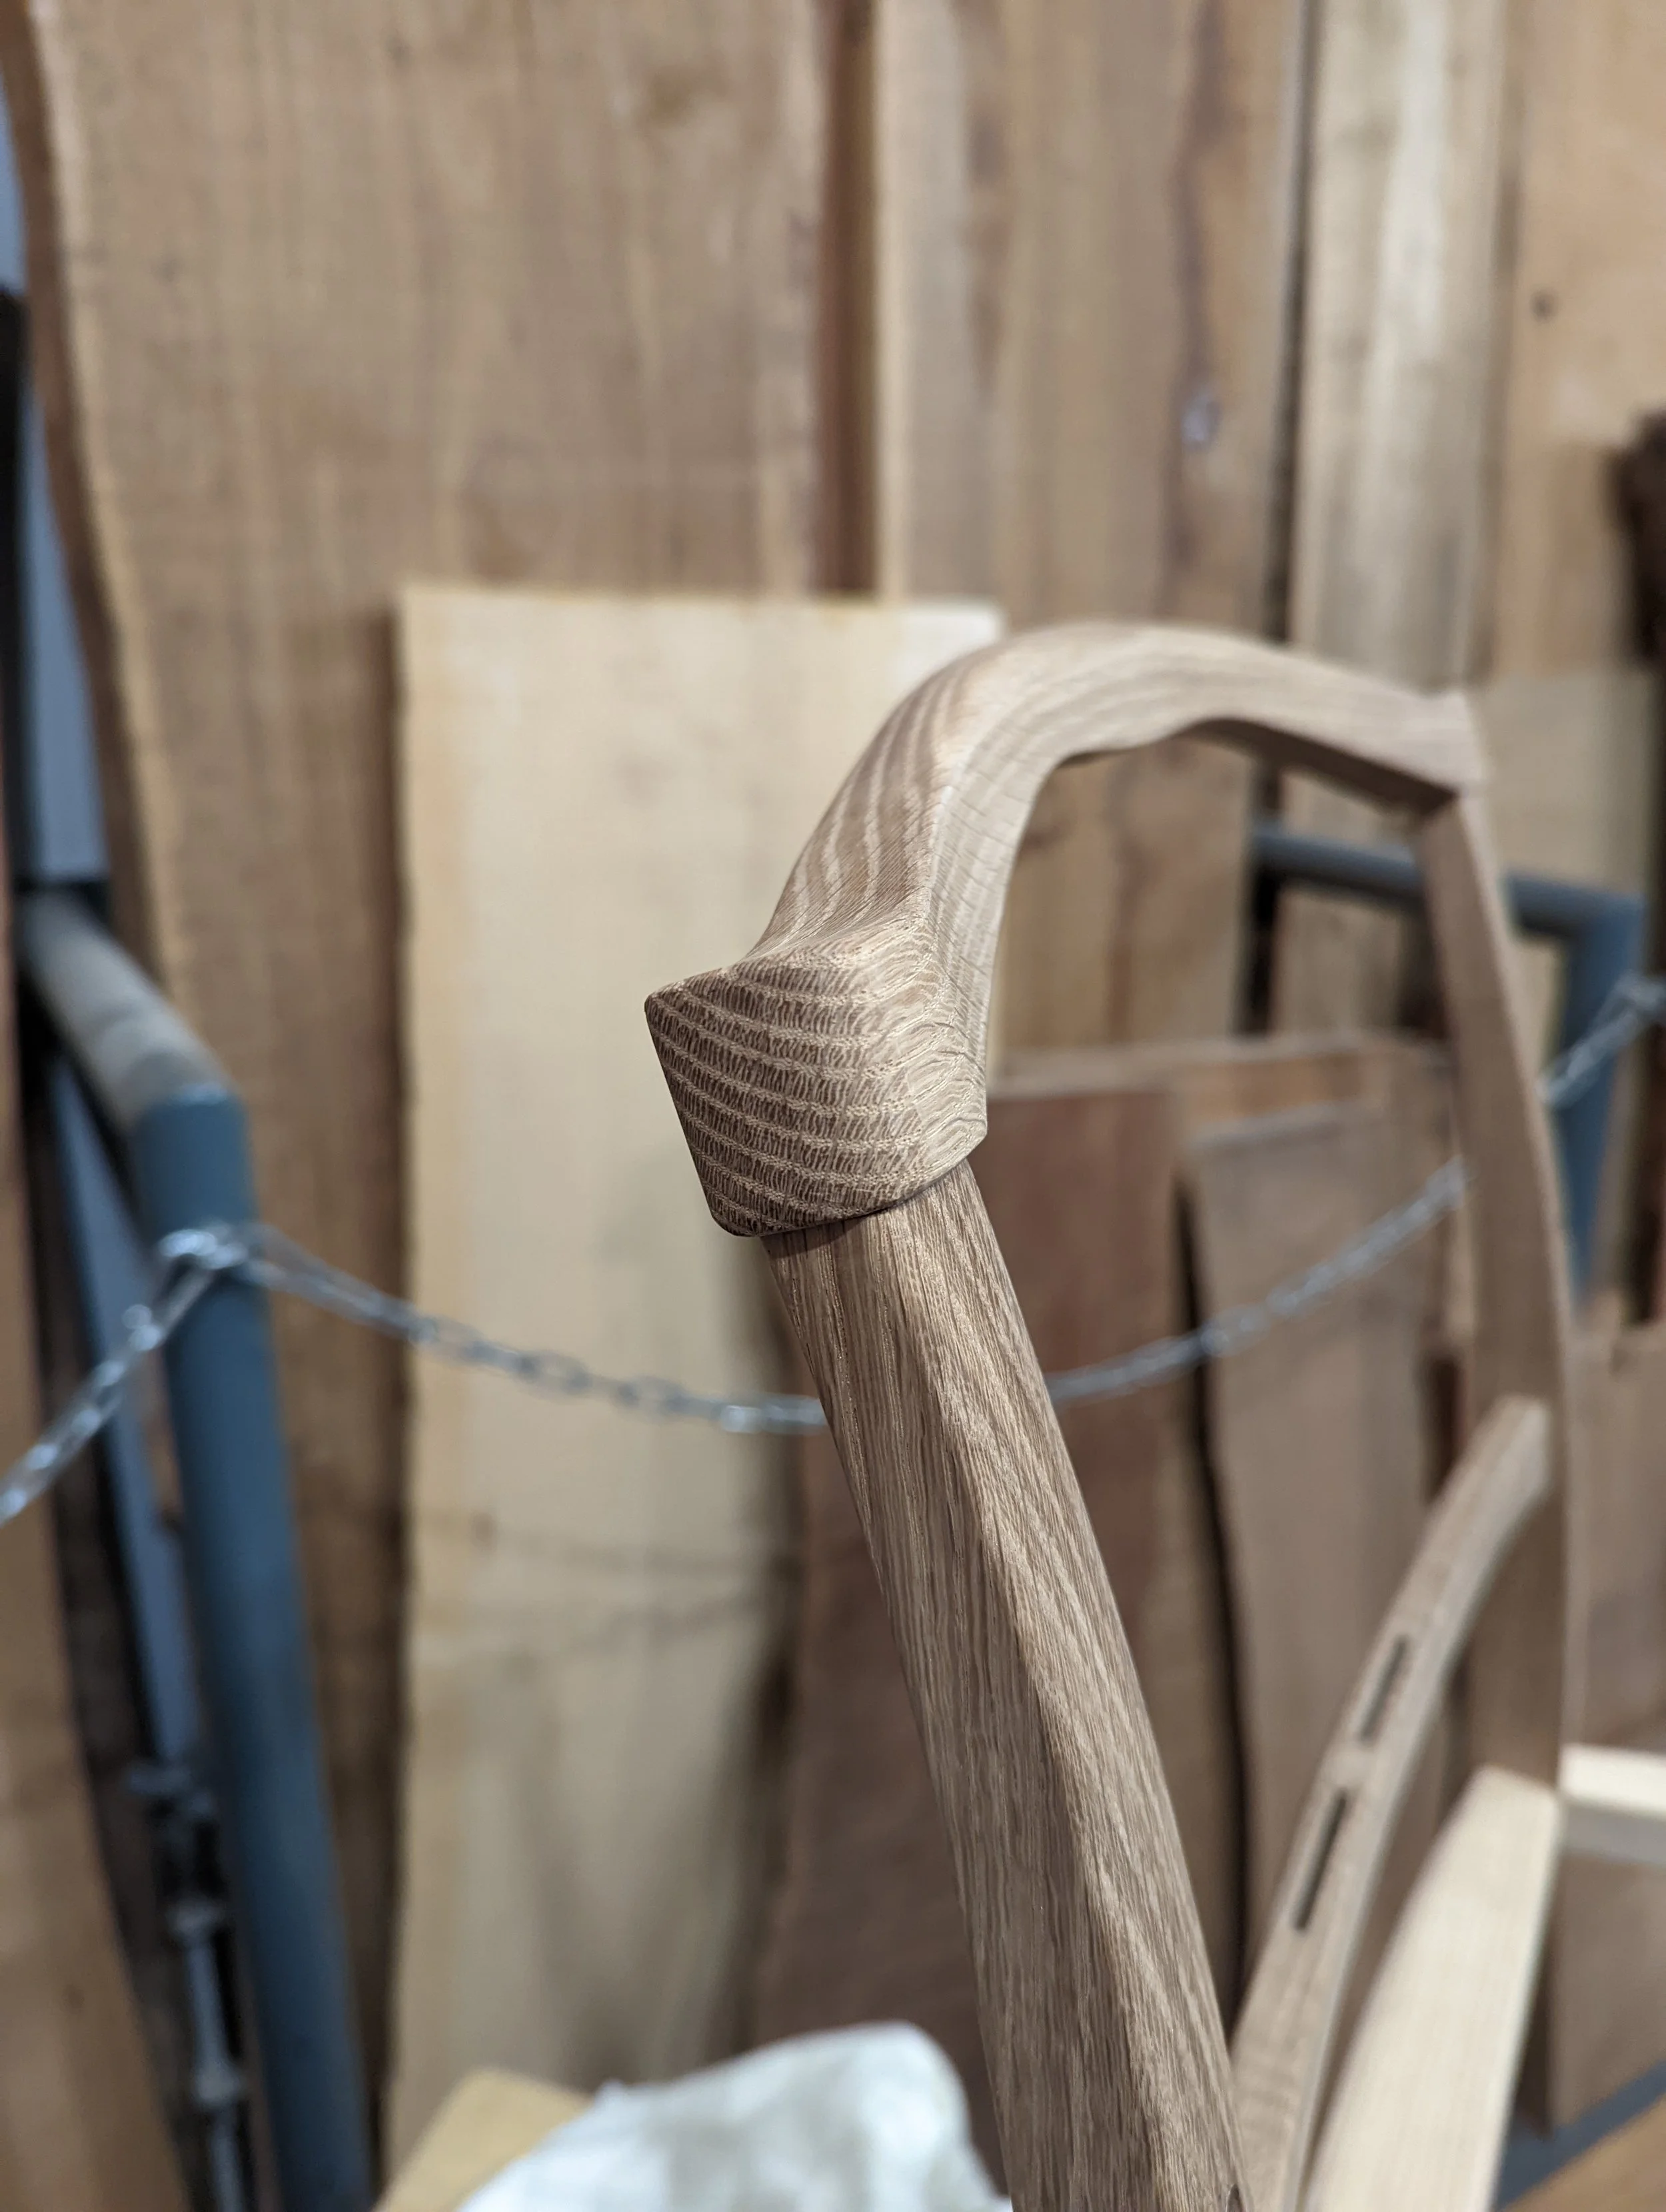
The arms come next. Floating tenons are used. It is another complex joint as you are fitting to a cove on the back legs, both on the vertical and horizontal axis. The initial fitting of the joint is done on the arm blanks before they are fully cut out.
Specialized cauls are used to position the required clamps during the fitting process. Clamp placement and pressure needs to be as consistent as possible during this process as the fit can be greatly affected otherwise.

With the chair all glued up, the only thing left to do is the weaving of the seat. Sea grass was used for the danish weave. As it is very abrasive, the chair was wrapped in rags to prevent finished surfaces from being damaged.
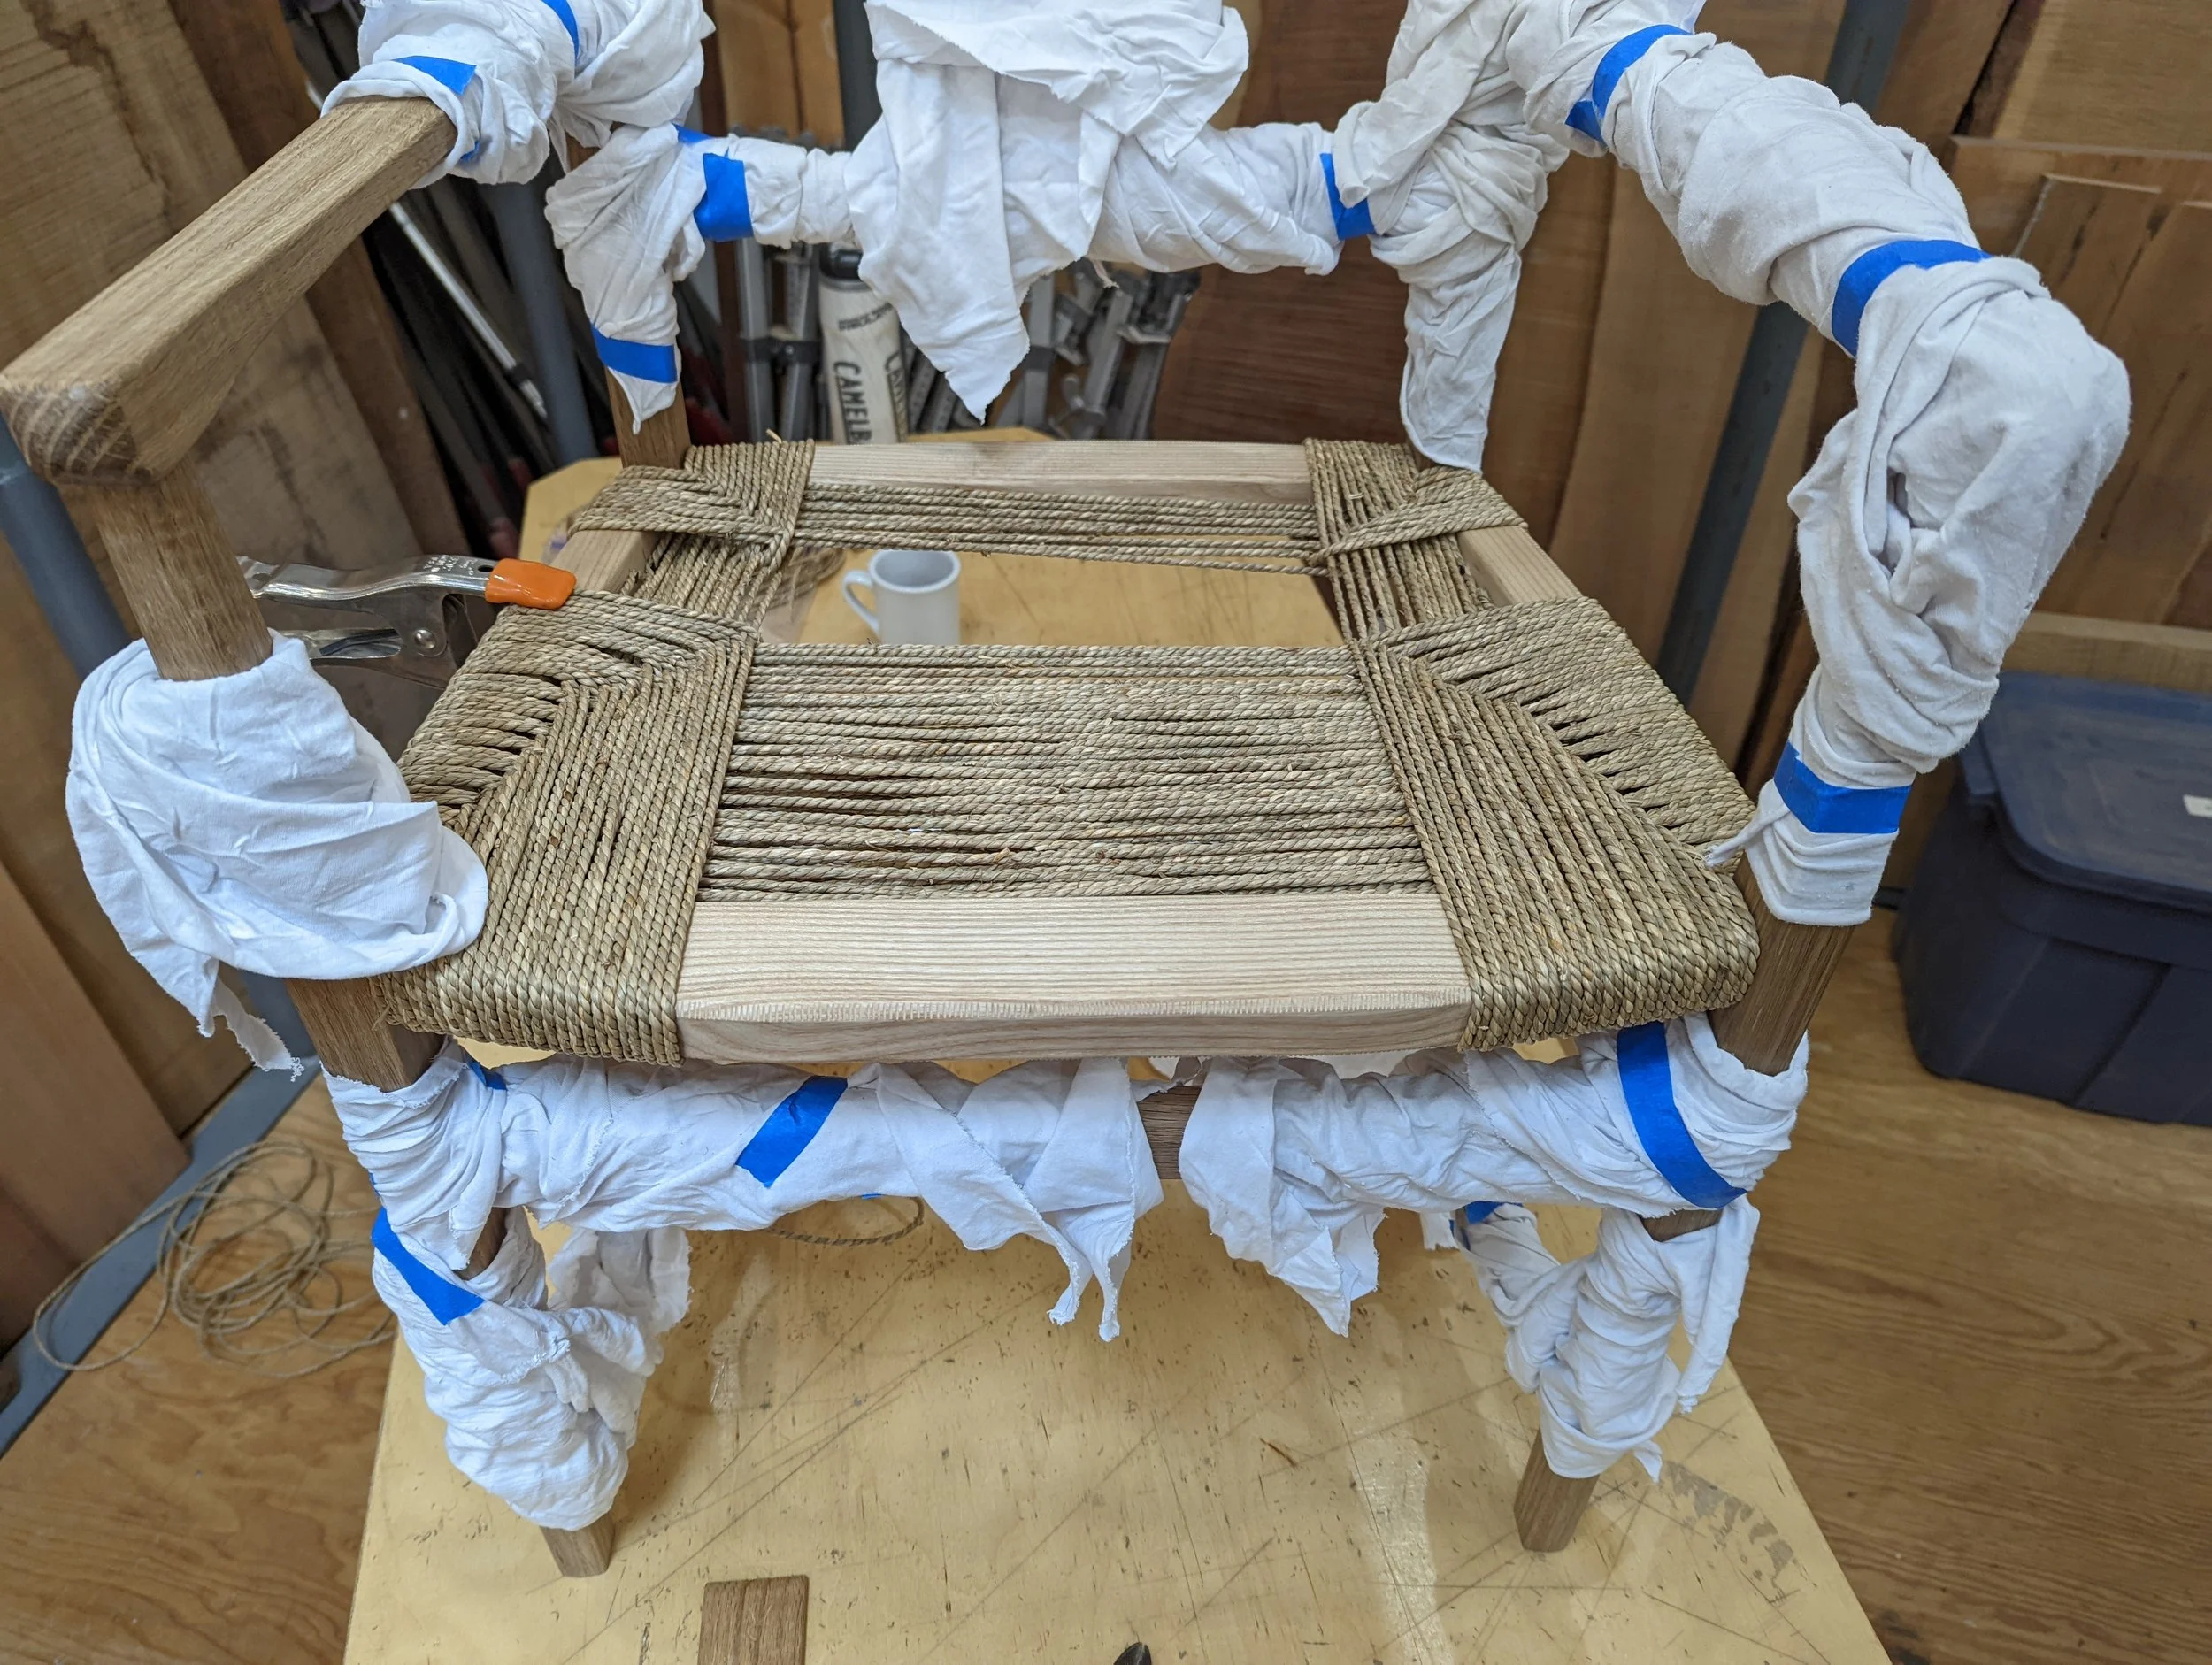
The chair was finished with a hard protective wax (Renaissance Wax). It’s a simple finish that protects the wood from dirt and natural oils on your hands.

This is without question the most challenging piece I’ve done. It took a full 10 weeks of concentrated effort to complete it. It resides at our dining table where it’s used every day. I may make another one at some point, but no plans to make a complete set!